Table of Contents
video toolbox notes
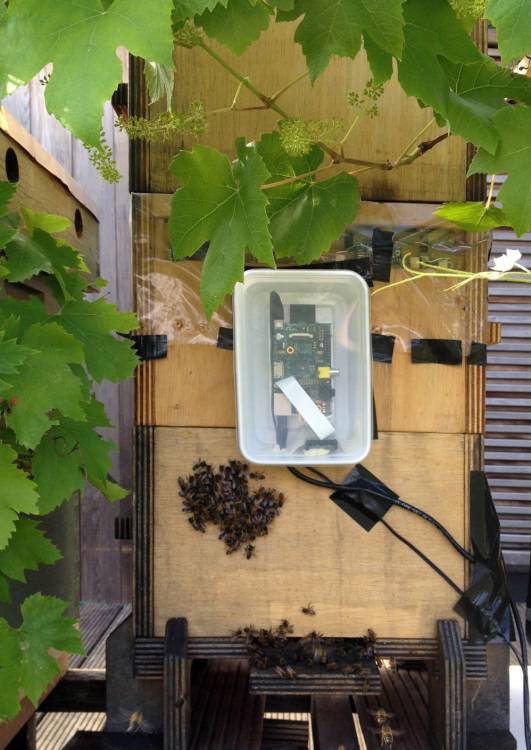
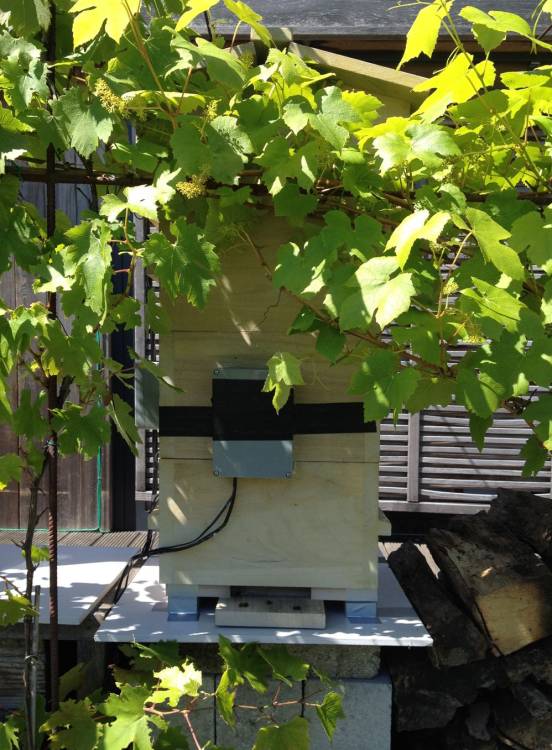
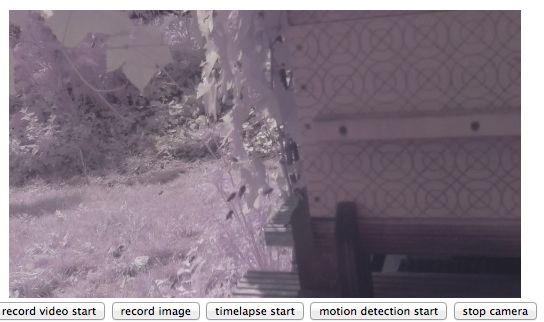
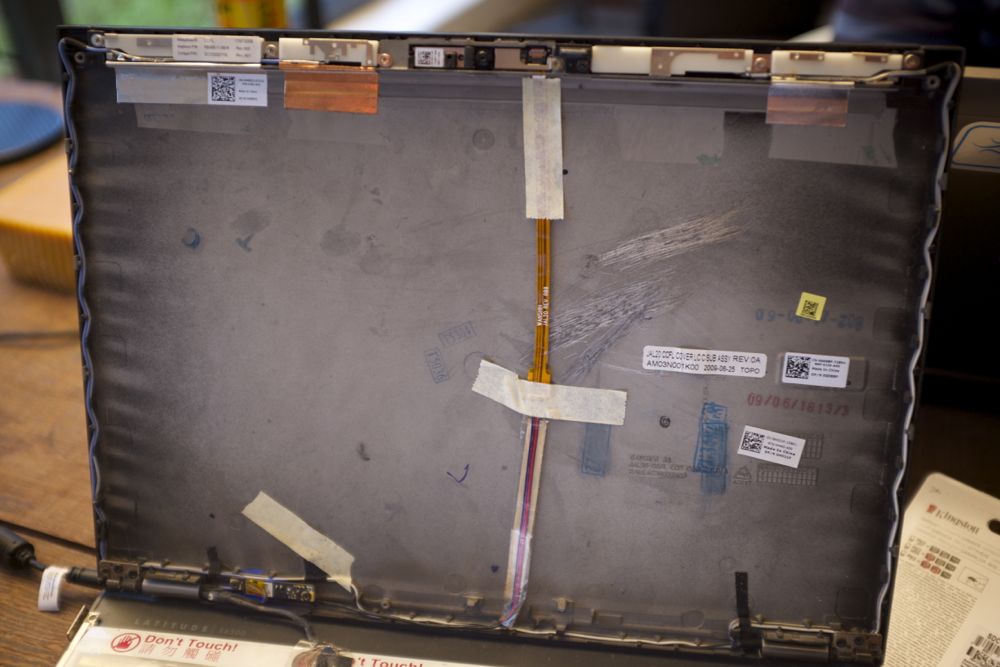
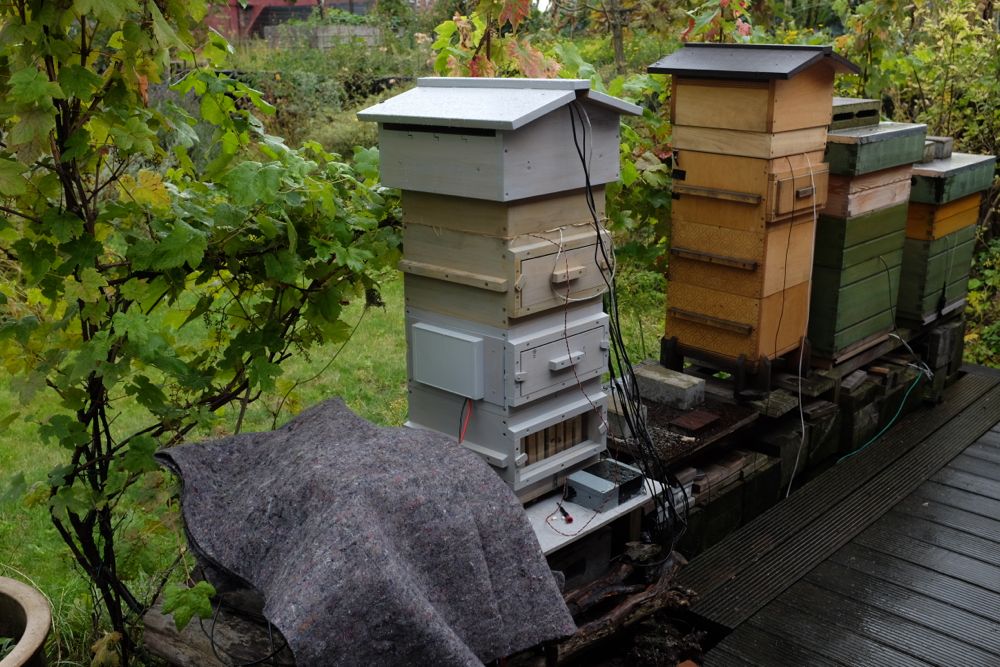
The flight activity of a bee colony is an important parameter to monitor the health and development of the colony. Therefore we set up a camera + computer that covers in top shot the landing platform of the beehive.
We will film the bees' activity from sundawn to sunset. Aditionally we film the traffic inside the beehive, from the landing platform up to the broodnest, with a second camera setup.
20/05/2014
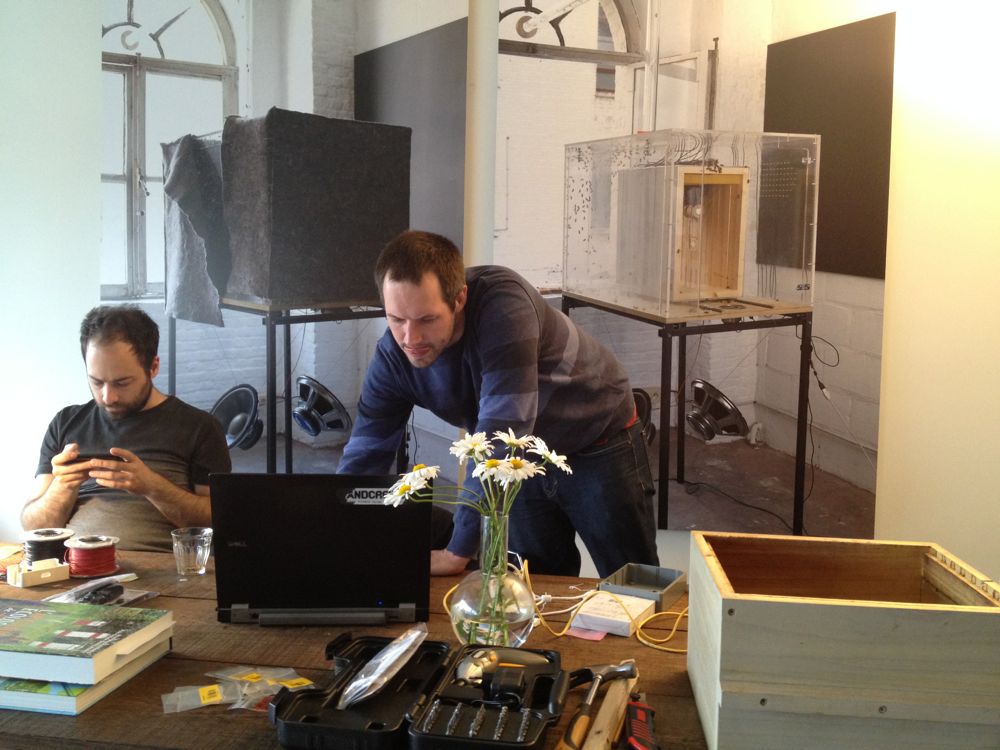
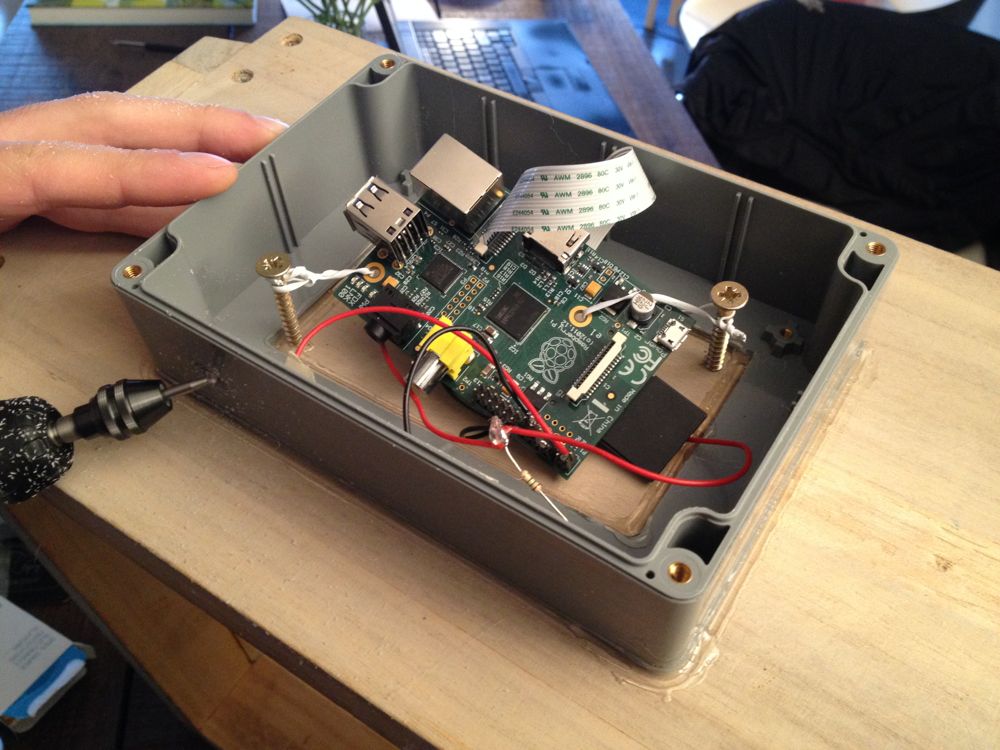
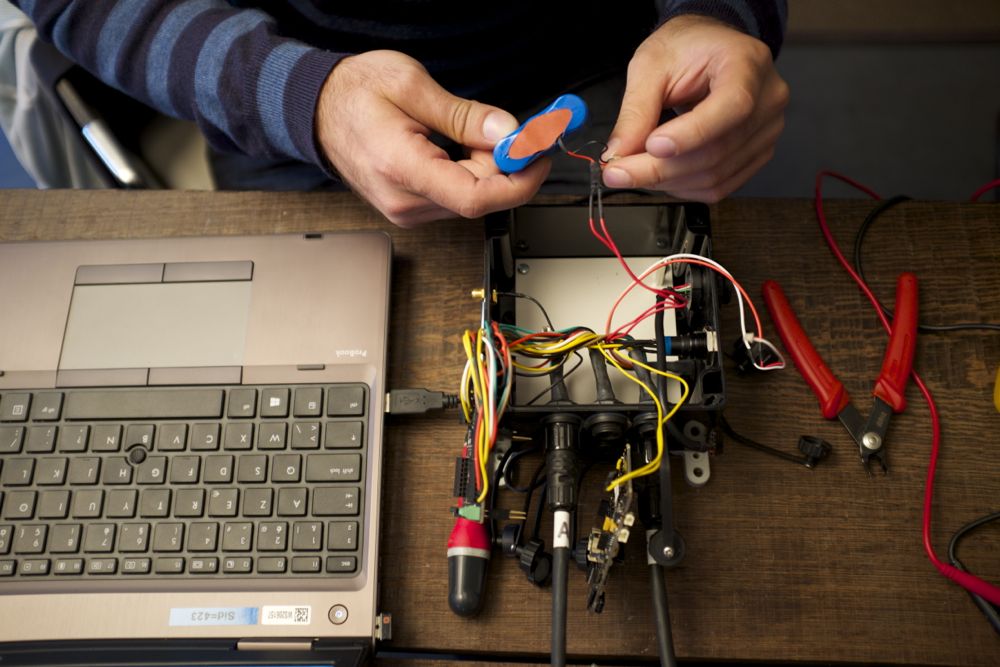
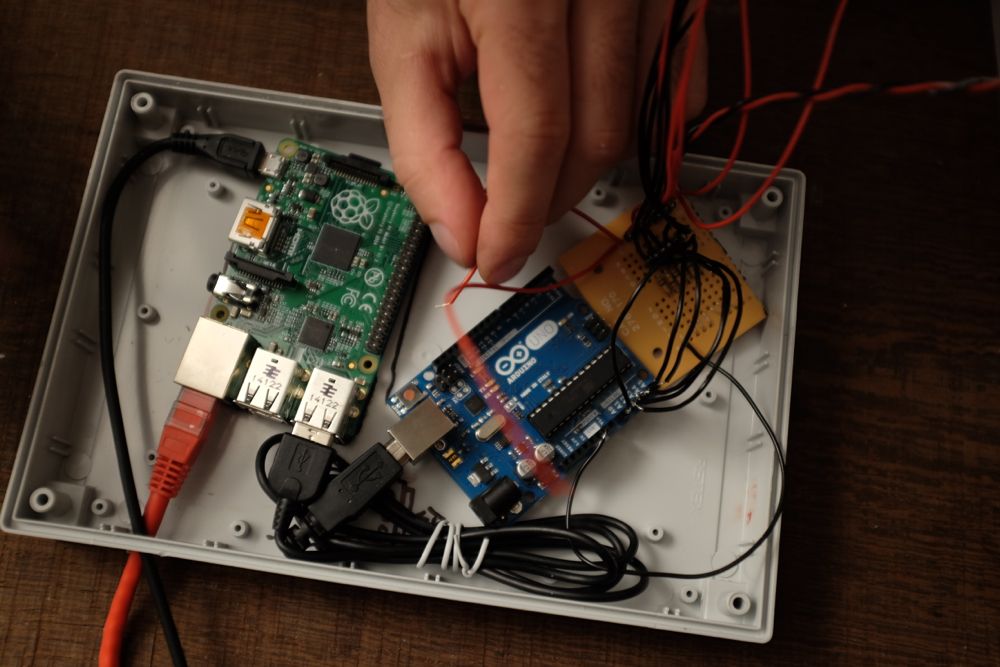
Working with Balt on a new setup for visual monitoring, on the sound beehive.
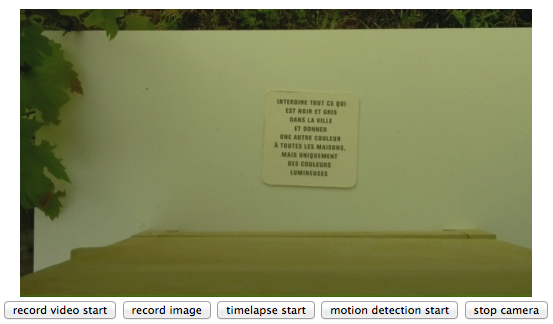
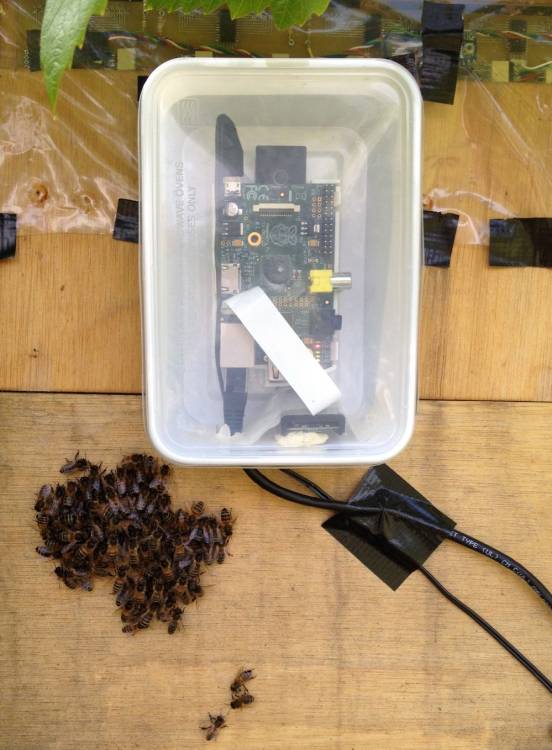
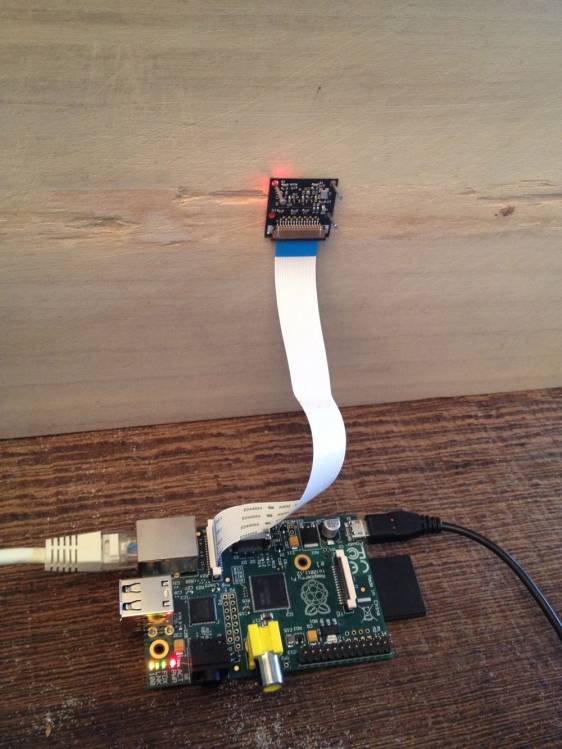
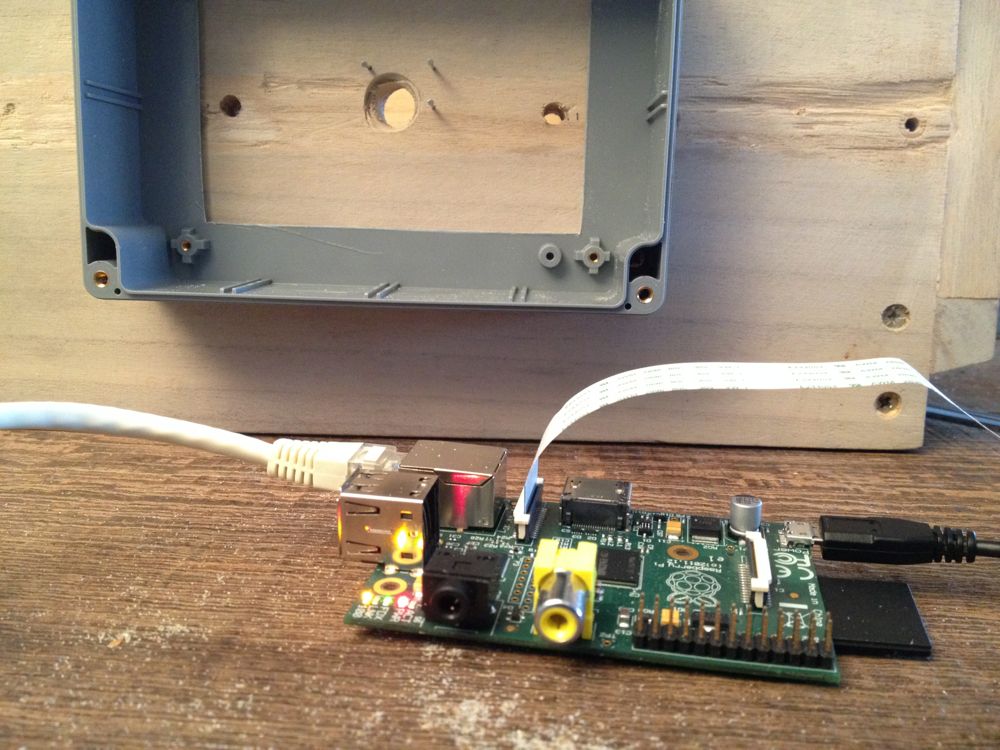
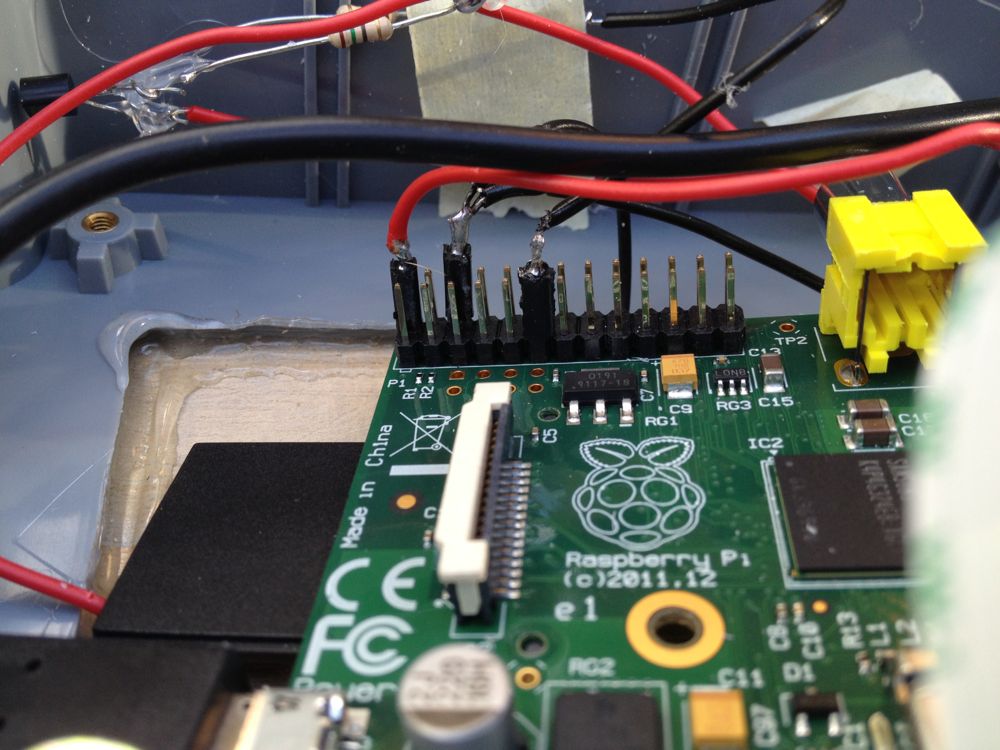
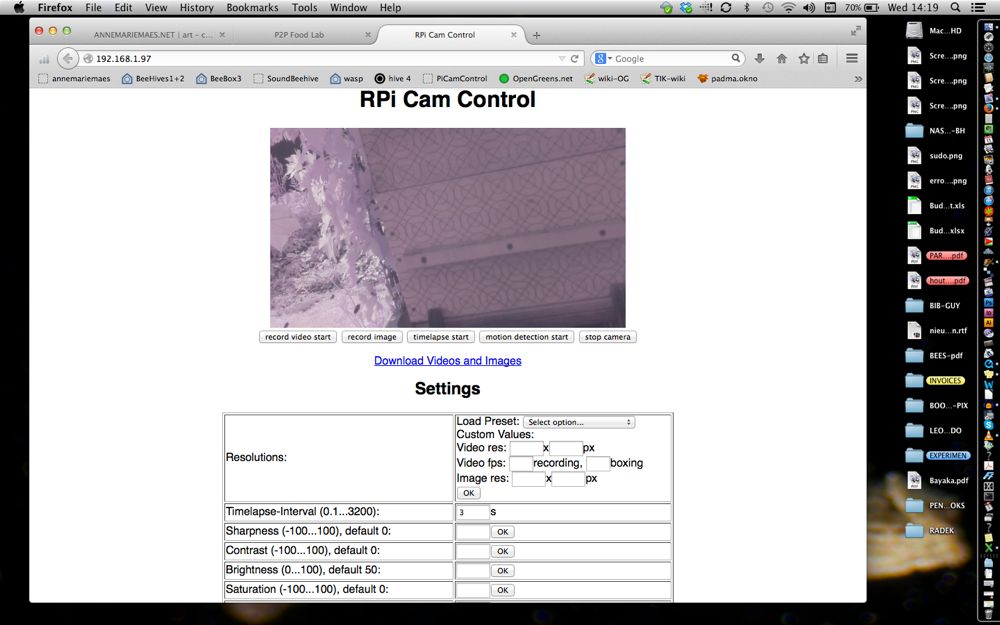
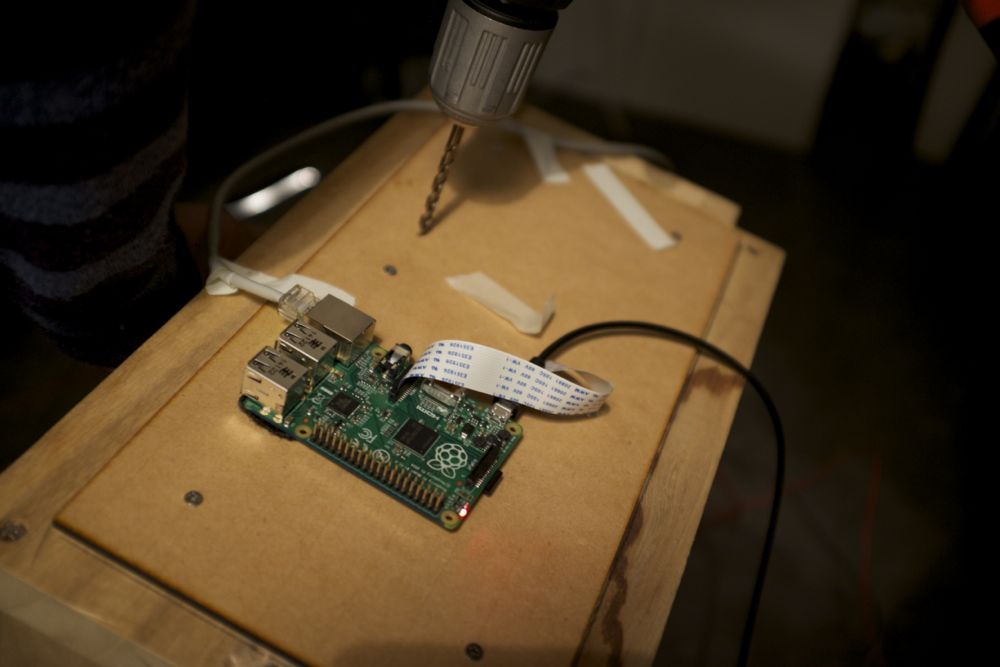
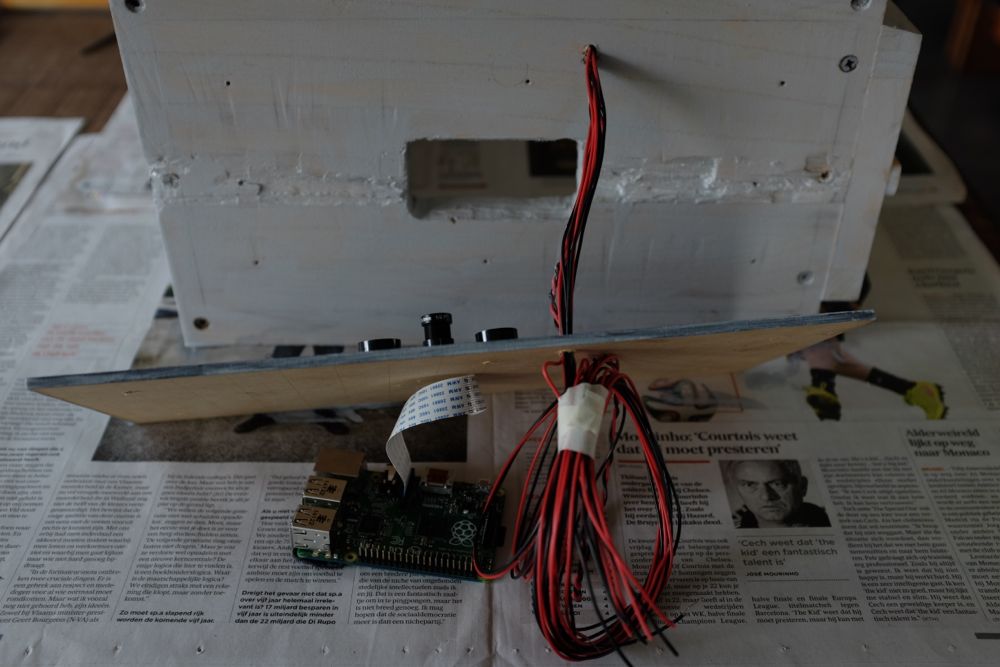
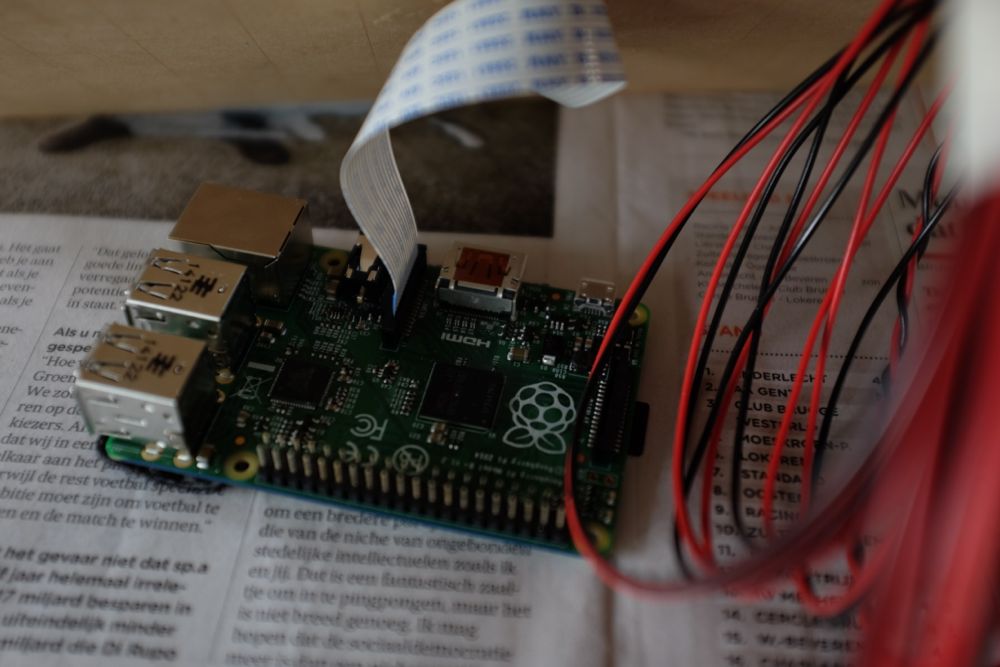
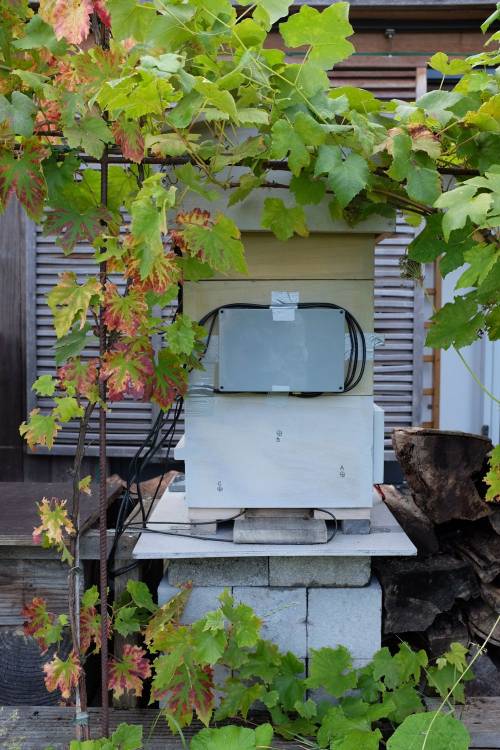
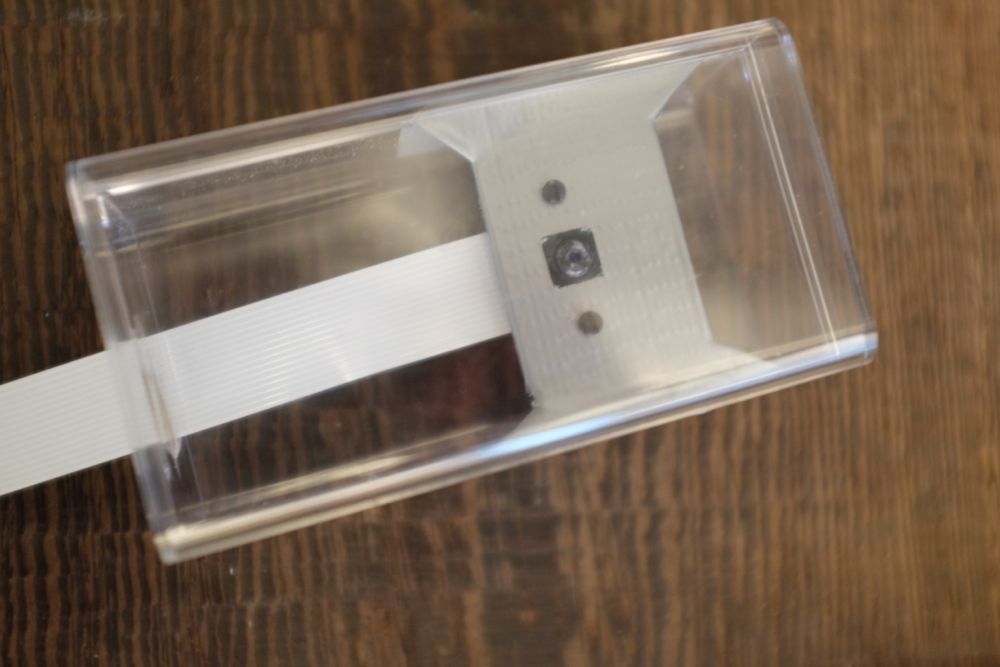
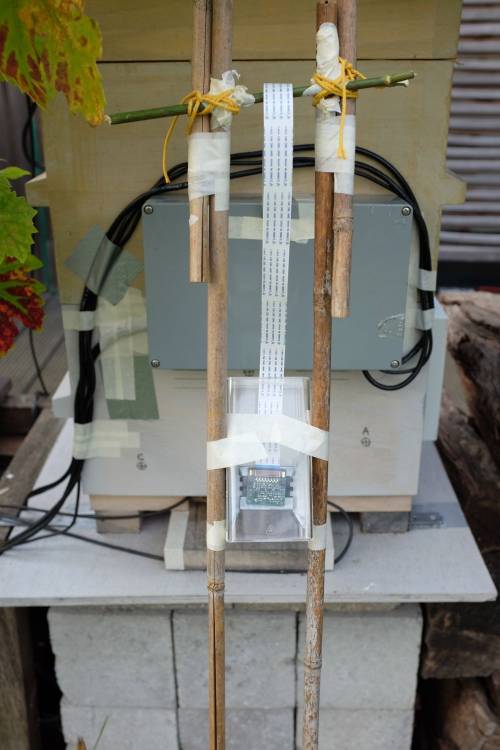
We will first try out the Raspberry camera (in a small box) connected to the Raspberry computer - cable is only 20cm long. We will mount the camera in top shot above the entry of the sound beehive. The URL on the local network is 192.168.1.6

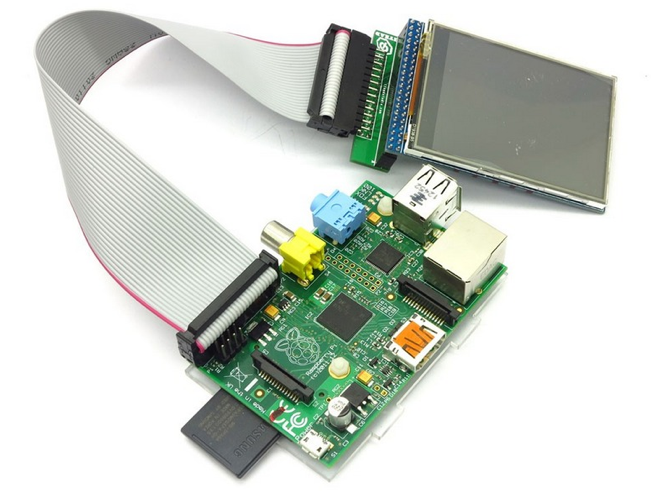
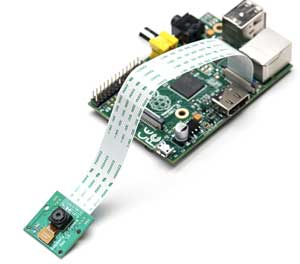
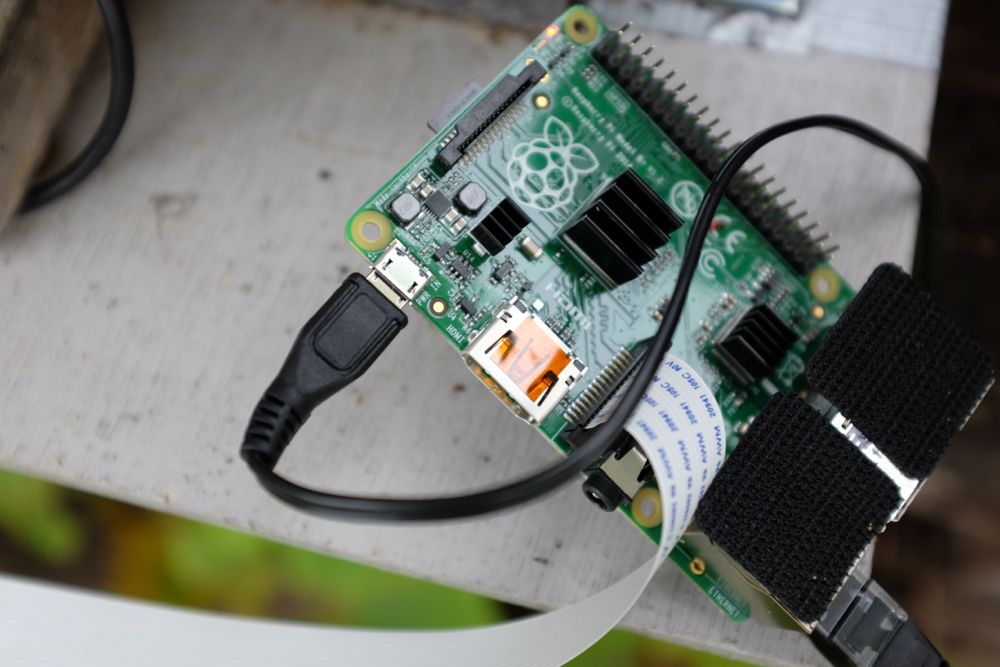
The Raspberry Pi Camera Module is a custom designed add-on for Raspberry Pi. It attaches to Raspberry Pi by way of one of the two small sockets on the board upper surface. This interface uses the dedicated CSI interface, which was designed especially for interfacing to cameras. The CSI bus is capable of extremely high data rates, and it exclusively carries pixel data.
The board itself is tiny, at around 25mm x 20mm x 9mm. It also weighs just over 3g, making it perfect for mobile or other applications where size and weight are important. It connects to Raspberry Pi by way of a short ribbon cable. The camera is connected to the BCM2835 processor on the Pi via the CSI bus, a higher bandwidth link which carries pixel data from the camera back to the processor. This bus travels along the ribbon cable that attaches the camera board to the Pi.
The sensor itself has a native resolution of 5 megapixel, and has a fixed focus lens onboard. In terms of still images, the camera is capable of 2592 x 1944 pixel static images, and also supports 1080p30, 720p60 and 640x480p60/90 video.
The camera is supported in the latest version of Raspbian, Raspberry Pi's preferred operating system.
http://www.element14.com/community/docs/DOC-54359/l/raspberry-pi-camera-board
http://www.element14.com/community/docs/DOC-65138/l/getting-started-with-the-pi-camera-instructions#Use
5 megapixel image sensor
Raspicam-videointerface dopcumentation
Raspberry Pi focus ring, to be 3D printed: http://www.thingiverse.com/thing:211641
Het werkt allemaal, en de camera interface op de computer is heel handig, maar ik vind dat de focus van de Raspberry Pi camera te ver weg ligt. Ik heb de camera helemaal boven aan het dak van de hive moeten bevestigen om de bijen beneden scherp te krijgen, waardoor die beestjes natuurlijk heel klein worden …
Met de webcam die ik vroeger gebruikt heb (de logitech 9000) konden we de brandpuntafstand veel korter brengen, maar dit gaat niet met deze raspberry pi camera. Misschien toch terug met de Logitech werken?
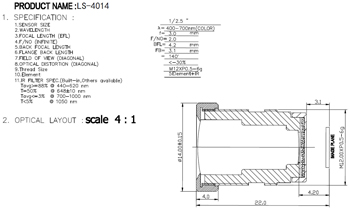
Comparing the Raspberry Pi camera module with stock lens to a 35mm camera: Comparing to a 35mm film camera (36mm x 24mm frame), the relative sensor size is a factor of about 10 (36mm/3.629mm). So the Raspberry Pi camera module with its 3.6mm f/2.9 lens acts like a 35mm camera with a 36mm f/2.9 lens, in terms of field of view and brightness. Depth of field is likewise scaled 10x, which is to say, not at all like the 35mm camera, as is typical of video cameras with small sensor chips. The full-frame aspect ratios also differ, namely 4:3 (Raspberry Pi) versus 3:2 (35mm film). The 35mm lens equivalent for the 1080p video mode would be 3.6mm*36mm/(1920*1.4um) = 48mm at f/2.9. Again, this comparison applies to field of view and brightness, but not depth of field.
http://www.truetex.com/raspberrypi
How to hack the standard focus of the Raspberry Pi lens?
The threaded focus adjustment is set to infinity at the factory. Changing the focus from infinity to something closer requires that you turn the threaded lens cell counterclockwise, moving the lens further away from the imagning sensor.
change raspberry focus
We followed advise on this website and step by step Bob hacked the PiCam and succeeded in changing the focus from infinity to 'custom'.
The evening of 27/5 everything worked fine, but right now there is no contact anymore with the PiCam. Friday we continue the research.
Bob will hack the PiCam and I start new camera tests on the populated Warre beehive instead of on the (still)empty one.
29/05/2014: aan Bob
De PiCam werkt fantastisch! Wat een super beelden! Bedankt voor de hack!
Zou je dit nog eens kunnen overdoen?
Nu ik zie hoe fantastische beelden het zijn, zou ik heel graag ook de PiNoir (de infra red) in de beehive steken alvorens de bijen toekomen.
Dit is een paar dagen uitgesteld omdat het gisteren verlof was, en ik dit totaal vergeten was.
Ik ga de bijen nu woensdag halen.
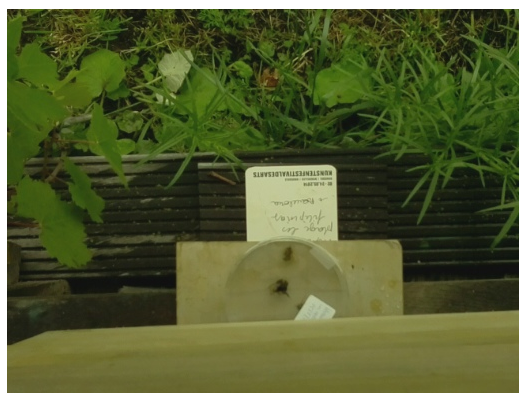
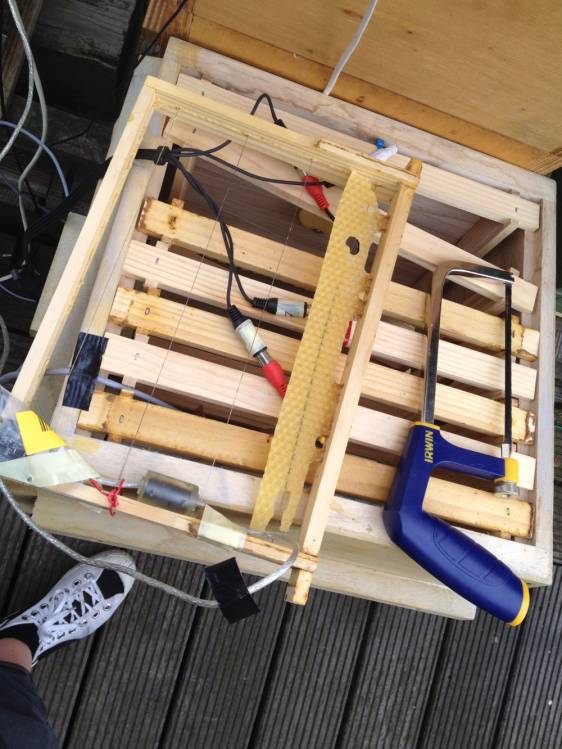
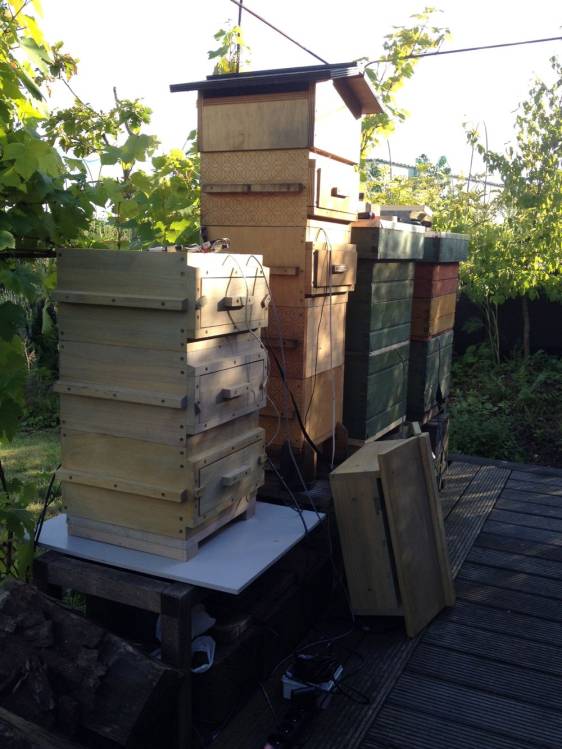
Ik ben nu aan het testen met de setup op de bijenkorf naast de nieuwe kast, zodat we kunnen testen met echte bijen.
Fantastisch! Als we nu én de microfoons, én de 2 camera's (binnen en buiten), én de sensors binnen/buiten + ook nog een accelerometer die hopelijk dinsdag zal toekomen,
dan wordt het een super setup!
Balt is druk in de weer om scripts te schrijven die de 2 camera's synchroniseren met de microfoon opnames en om de 15 minuten 3 minuten te filmen aan 30fps.
Dit zal hij ook automatiseren gelinkt aan data van opkomende en ondergaande zon - zodanig dat we niet filmen (buiten) als het donker is.
Spannend allemaal!
Maar om binnen in de hive te filmen zouden er nog 2 infrarode leds moeten geïnstalleerd worden. Zou jij dit nog kunnen komen doen?
Ik heb de LEDS al gekocht bij Elak.
En ook zou je de PiNoir nog moeten hacken.
Raspberry Pi - PiCamera test on Bees in Pandora's video database
Raspberry Pi - another video test
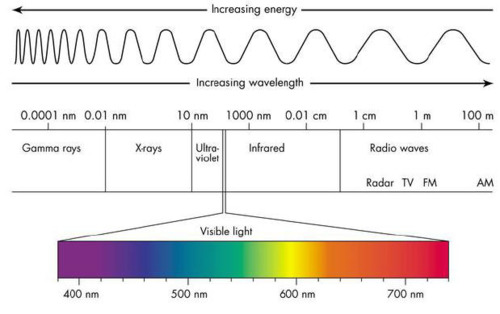
De wavelength is de golflengte van het licht en bepaalt welke kleur het licht heeft. De leds zenden licht met een golflengte van 940nm uit en de Pi NoIr is het meest gevoelig voor licht met een golflengte van 880nm. Dat de golflengtes niet overeen komen mag geen probleem zijn voor de werking van de camera, behalve dat het beeld misschien iets minder helder is. Afhankelijk van de bron zien bijen licht van 300nm tot 600nm of 350nm tot 750nm, in ieder geval zitten ze ver boven de 940nm van de leds dus zullen ze er geen last van hebben!
Leds van 880nm zouden waarschijnlijk iets beter werken. Als je ze allebei koopt kunnen we morgen eens testen als je wilt. 840nm zou nog beter gaan, maar dan krijg je naar 't schijnt wel al een rode schijn. Ik denk niet dat de bijen het zouden merken maar je gaat het wel zien in je beelden.
Heb je al headers die ik over de pins van de RBP kan schuiven? Die gaan we zeker nodig hebben. De werking van de leds synchroniseren met de camera is een goed idee maar dan heb ik wel een transistor nodig om de schakeling te maken. Met een beetje geluk heb ik er thuis nog een liggen en anders ga ik er morgen wel achter.
a screen for the raspberry
LCD monitor for Raspberry Pi
2/6/2014: Balt wrote a script to link the altitude of the sun (sundawn and sunset) to the Raspberry Pi recordings. He based his code on this algorithm: http://sidstation.loudet.org/sunaltitude-en.xhtml
SunAltitude is a command line utility that determines the sun altitude, i.e. the angle between the horizon and the sun center and the minimum sun visibility height, i.e. the minimum height above ground level at which the sun upper limb is visible. The software needs the observer's position (longitude, latitude, altitude above sea level) and optionally accounts for atmospheric refraction.
Very precise algorithms are used for the computation of the sun position, but local atmospheric conditions can affect the actual values.
Exceptionally, the algorithm might not converge for very specific combinations of time and observer's location, but this limitation should not be problem for most of the users.
From now on, we don't make any night recordings anymore, which will give us more space on the storage disk. Therefore we could higher the resolution of the video's a bit, ending up with a heavier file in Mb, but at the end we don't use more space.
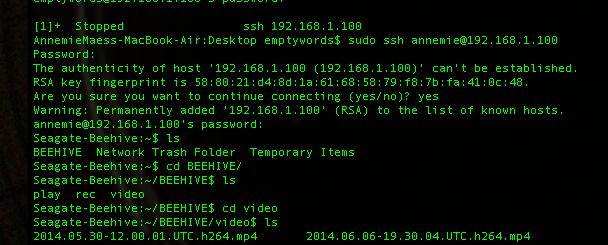
Balt also solved the problem of the video codec extension. Extension is now mp4 straight on the NAS, and visible immediately on the NAS. When we download the file and upload it in the Pandora video database, it gets (finally) smoothly accepted and is transcoded and uploaded without problems.
http://pandora.okno.be/PC/editor/00:03:33,00:00:00,00:03:33
New framing of the camera: http://pandora.okno.be/PD/editor/00:03:31,00:00:00,00:03:31
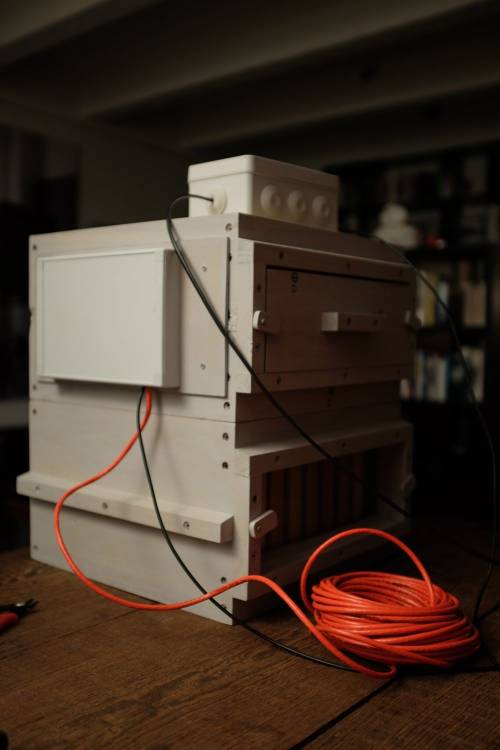
3/6/2014: Balt, Bob and me were working day + night (till 02:00am) to finalize the sound beehive.
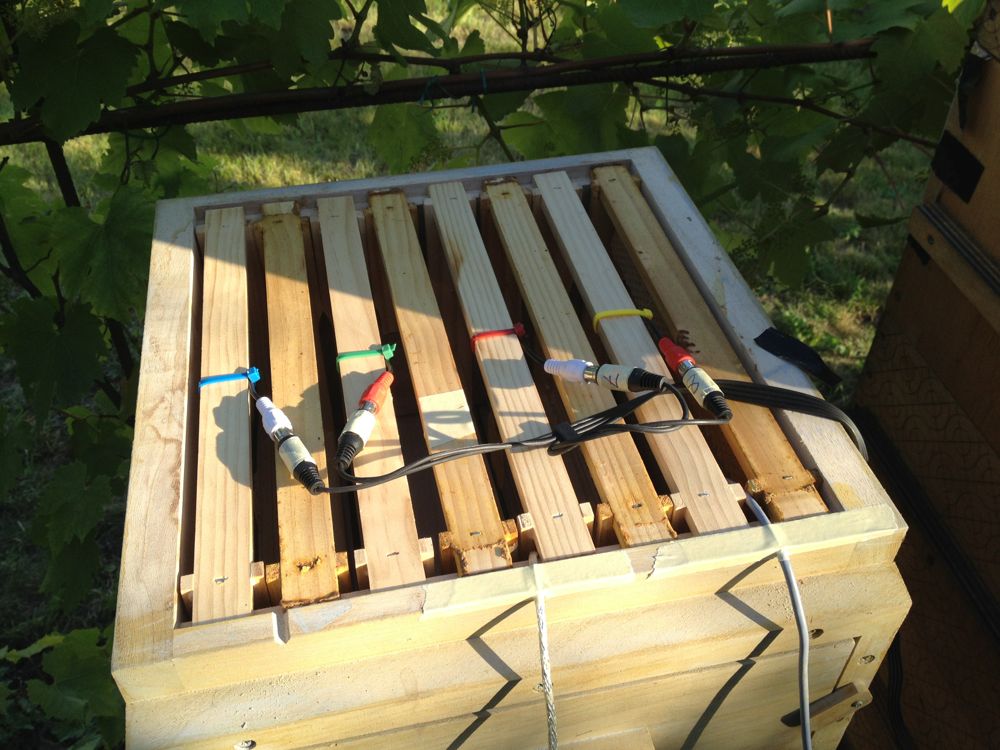
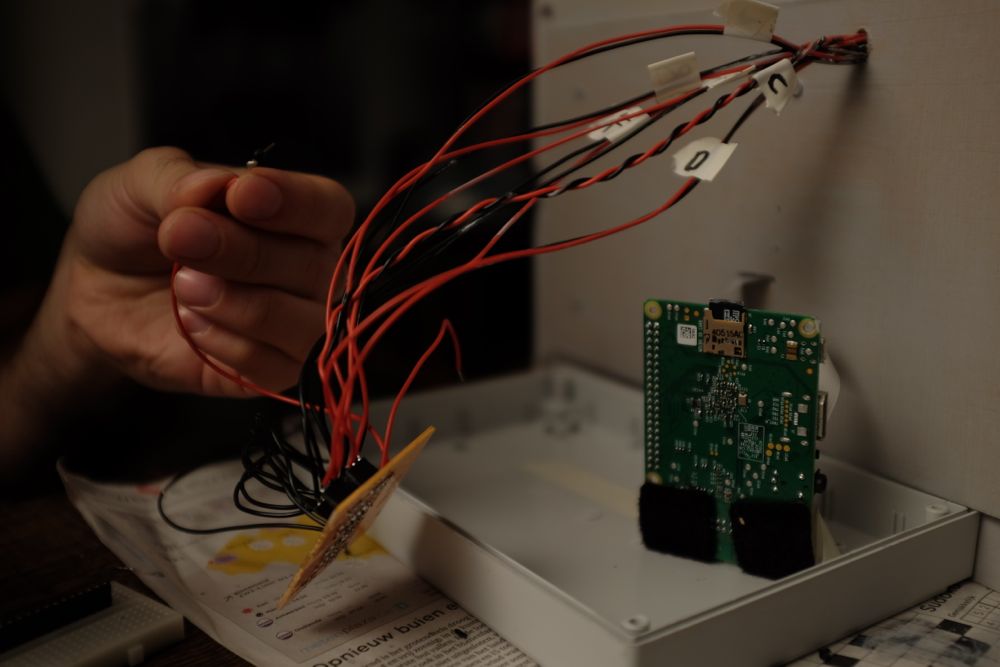
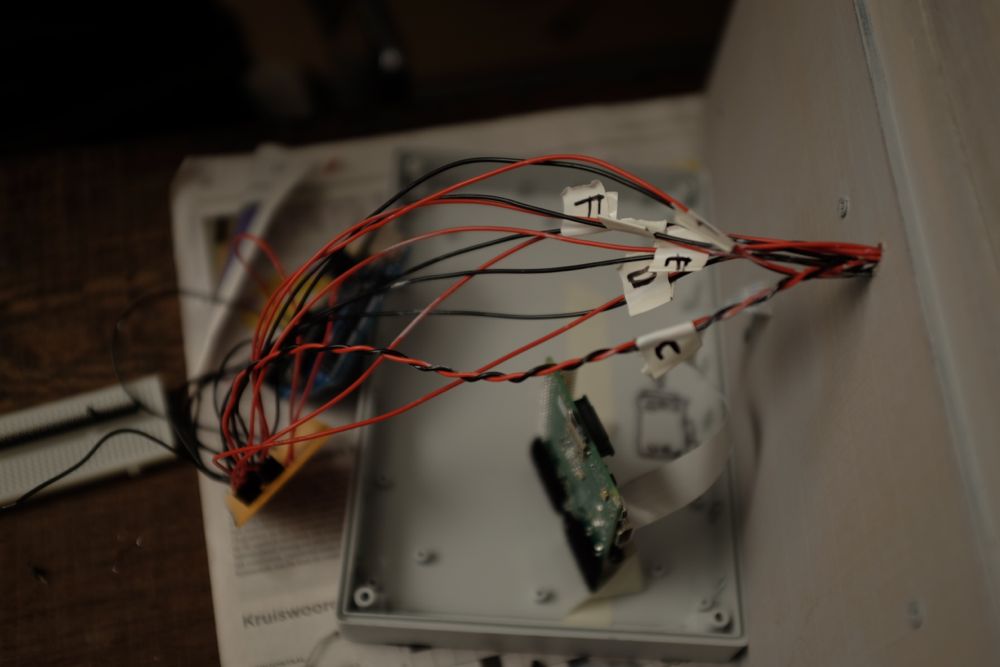
We now have following setup: a Warré beehive with 3 broodboxes. In the upper box we have 4 piezo transducers and 4 electret microphones, all connected by cables to an Asus computer and a Prosonus 8 channel-soundcard.
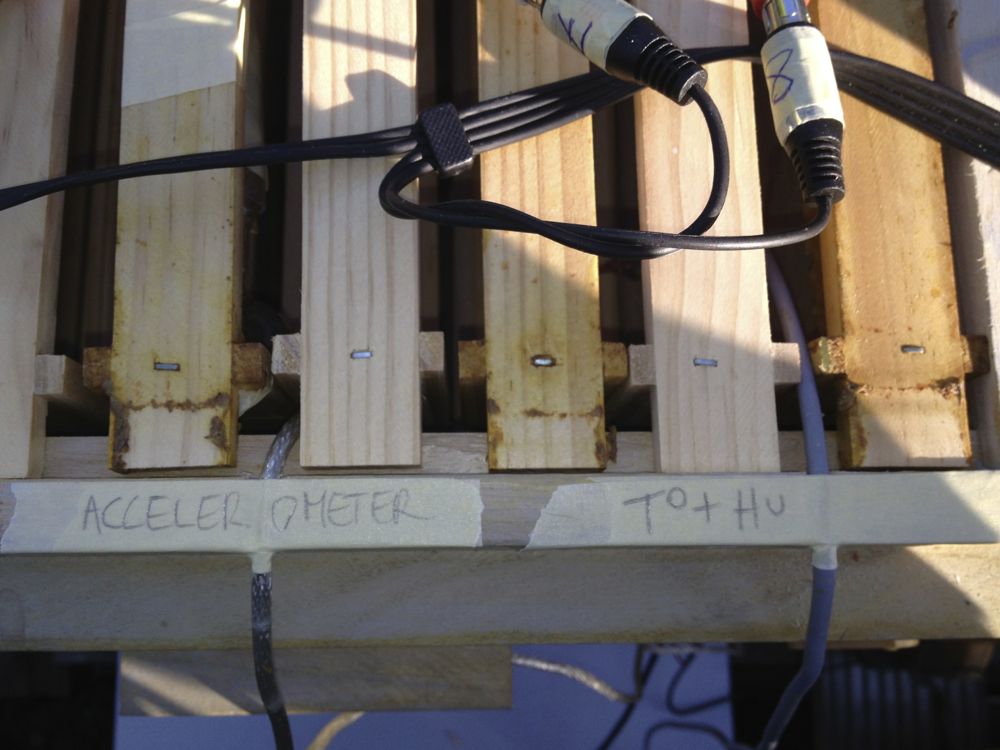
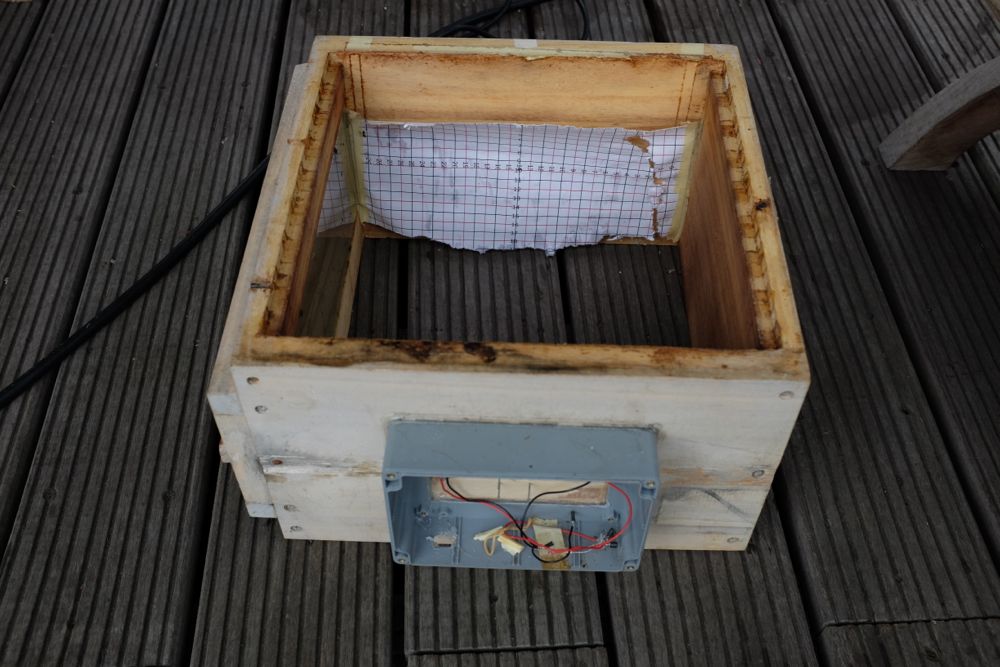
In the upper box we also introduced following sensors: a Phidget accelerometer and a Sparkfun combinet Temperature and Humidity sensor. The accelerometer is connected to one of the middle comb frames.
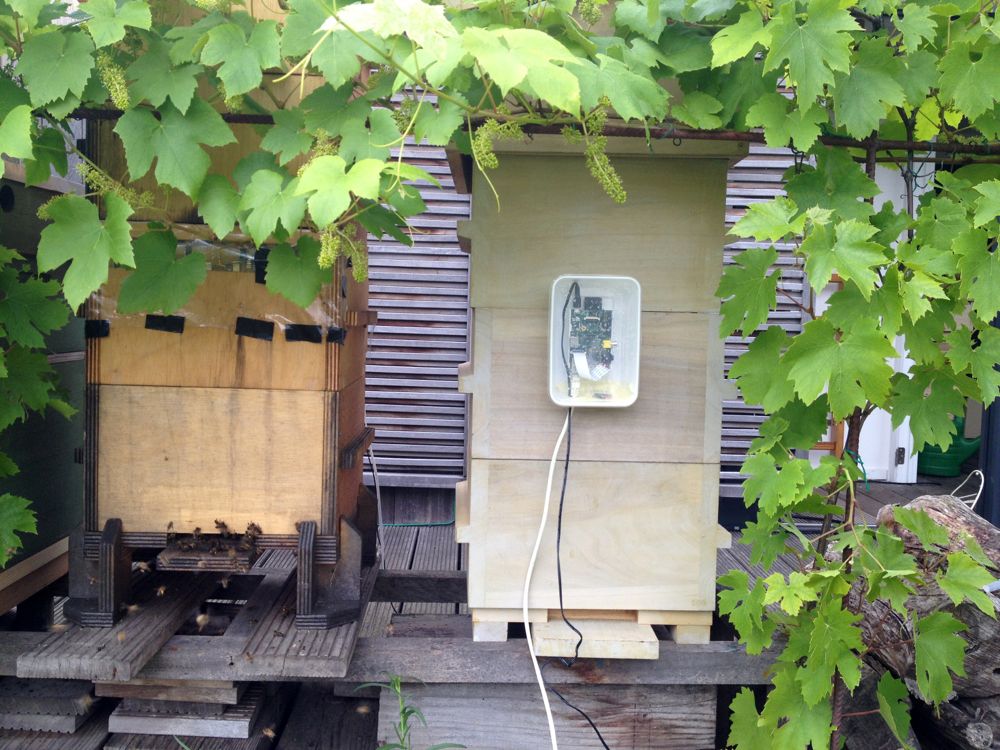
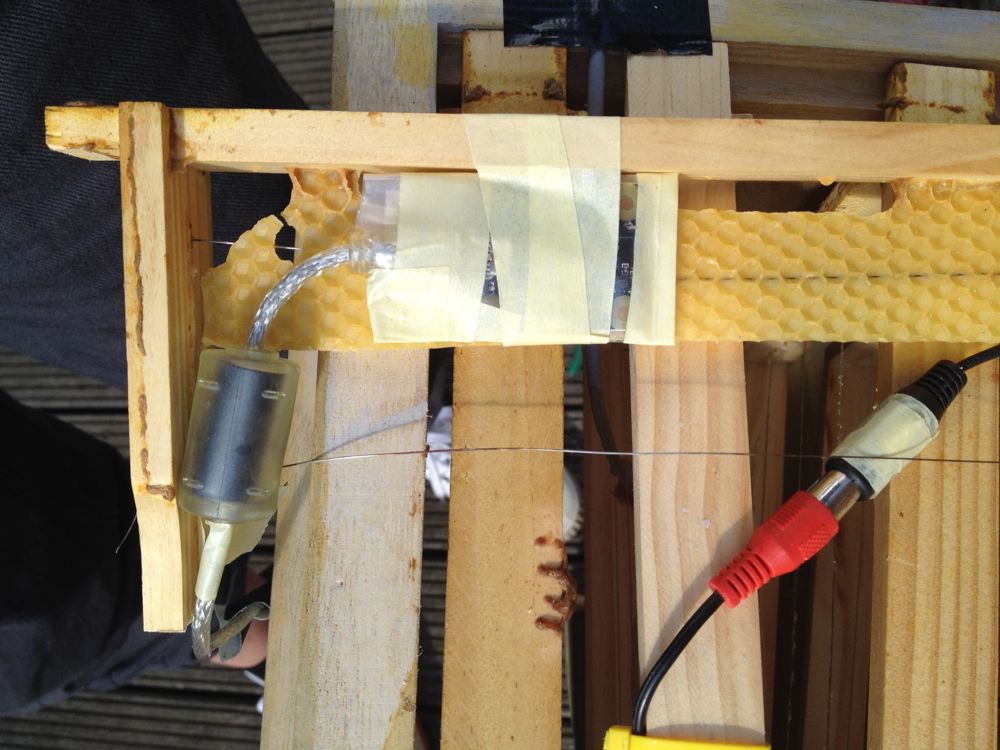
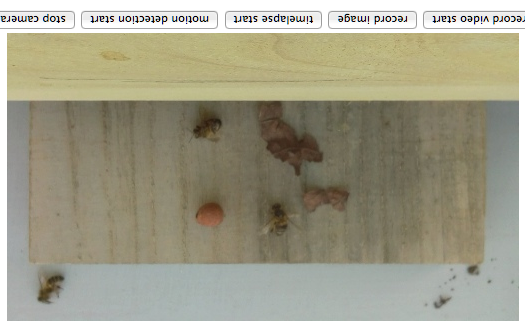
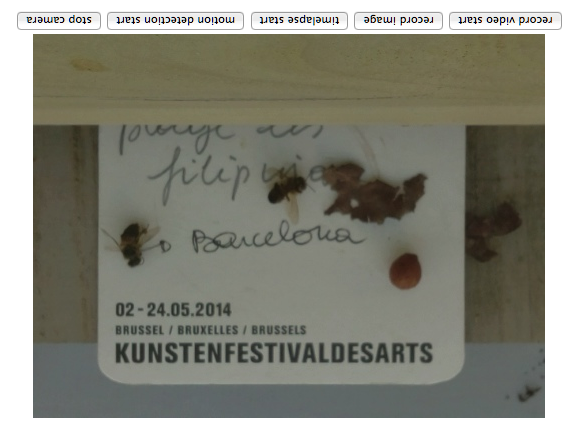
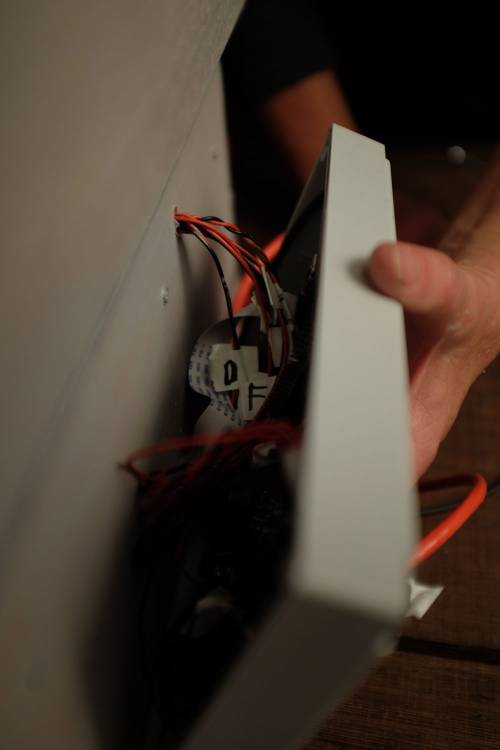
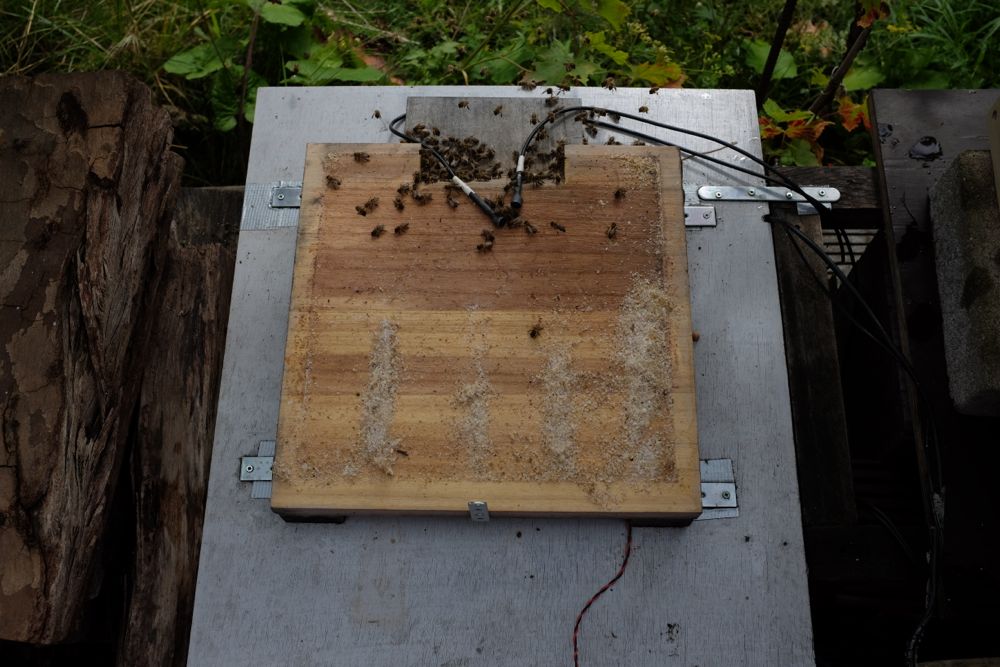
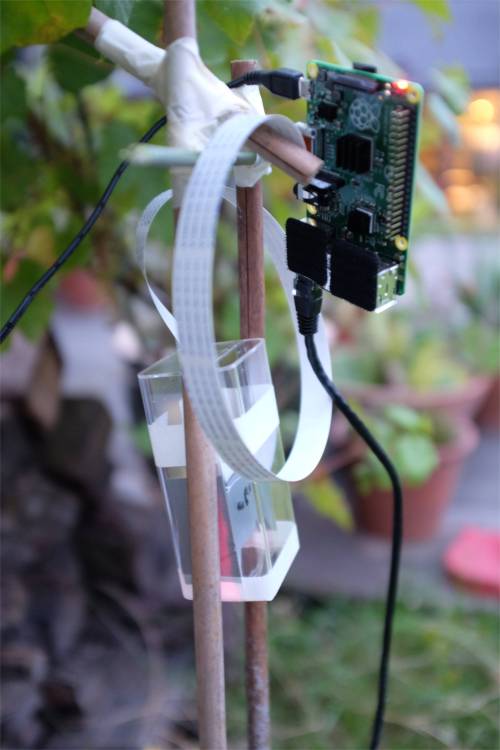
At the outside of the 2nd box (front) we have a PiCamera setup filming the flighthole and flightdeck.
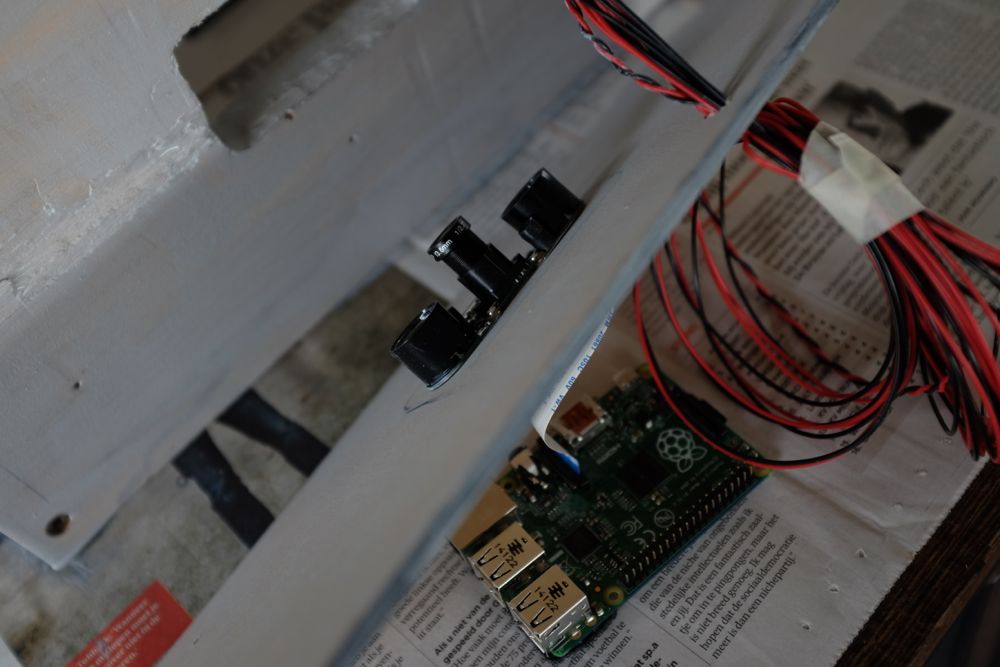
At the side of the 2nd box, we have another PiCam (the PiNoir infrared camera) which is filming at the inside of the beehive the transit from the bees from the flighthole to the nest in the upper box.
All sensor data are updated once per second.
The microphones and the 2 cameras are synchronised and they all record 4 x 3 minutes/hour on the regular intervals of 00:00, 00:15, 00:30 and 00:45. All files are stored on the NAS (network assited storage).
The 8 audio files are every time compiled into 1 mp3 file which is also uploaded to the OKNO server, and which can be accessed publicly.
4/6/2014: the weather gods are not at our side today. It does not stop raining, so I need to postpone to get the new bees to populate the hive. In the meantime we still have to solve some recording and network problems with the raspberries. Velleman charger is instable. Power supply needs to be fixed (cables) and some bugs with the interruption of the infrared leds (once on two). Audio runs fine.
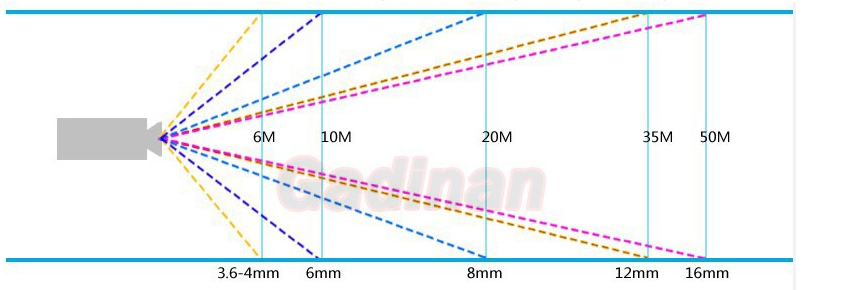
Remark: the FOV (field of view) of the Pi lens is very narrow, which makes it difficult to give a good overview inside of the beehive due to the short distance FOV.

5/6/2014: Still problems with the Raspberry Pi's. The PiNoir is not responding, he disconnects all the time. Restarting helps, but only for a few minutes. Maybe the charger is broken, or maybe there is a problem with the Raspberry. I decide to change for a new Raspberry, charger + RP. I open the construction (also the poisition of the hive was not really good) and change the raspberry, the ethernet cable, the power supply. I lower the Raspberry on the fromnt, as the focus was not correct. I make a new framing, I've put the hive on a sheet of painted wood. The operation is executed well, but the Pi's are not anymore online. Help! Balt will check tomorrow. I postpone once more the bee-supply. Norbert has queens but not yet young bees. Max. 1 week more, we will do supplementary tests, but the last on thursday I need to bring in the bees.
I also change the position of the accelerometer. I've read in 'The Buzz about Bees' (Jurgen Tautz) that the waggle dance vibrations spread over free hanging comb. So I've cut the wooden frame in half and I've fixed the accelerometer loosely with tape to the topbar. We still have to install the linux program of the accelero sensor on the SD card of the Raspberry Pi.
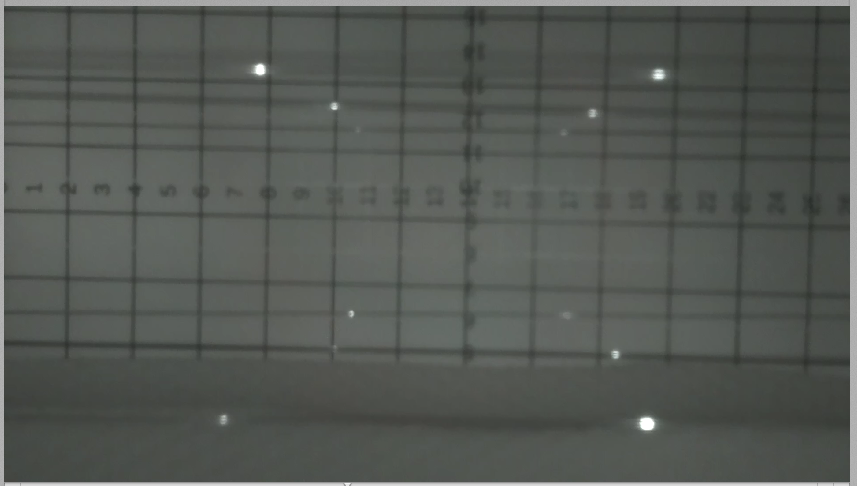
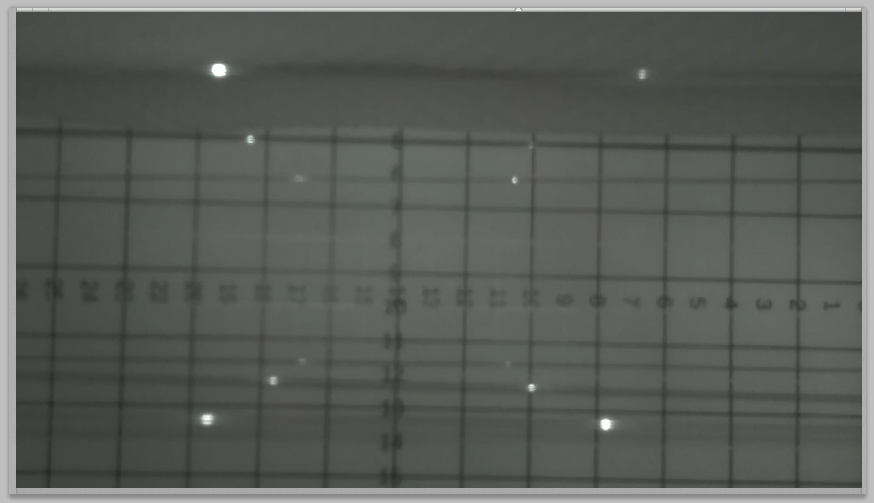
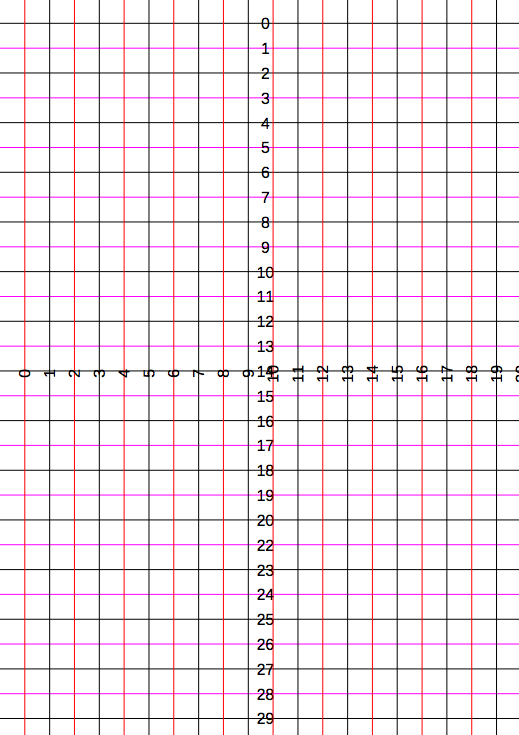
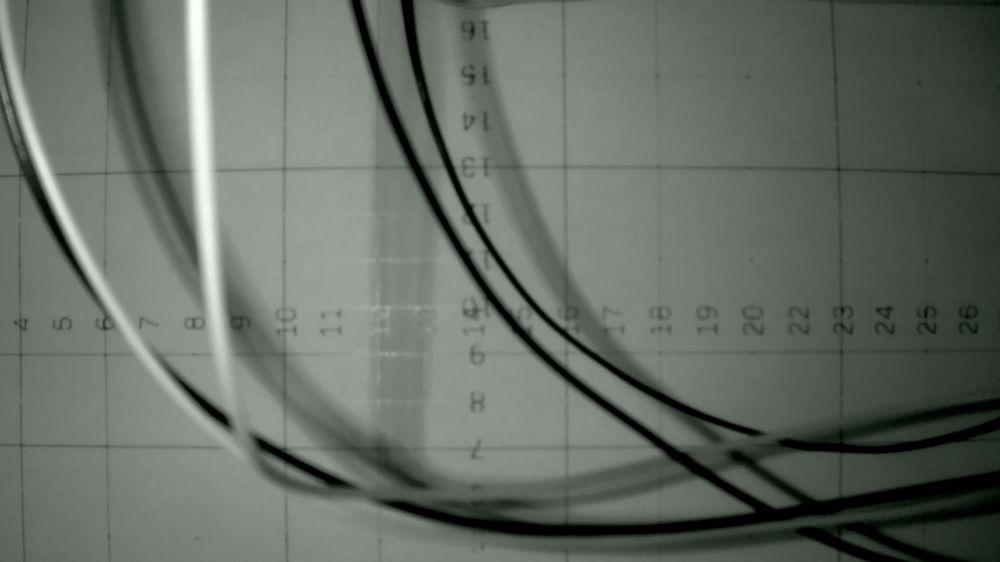
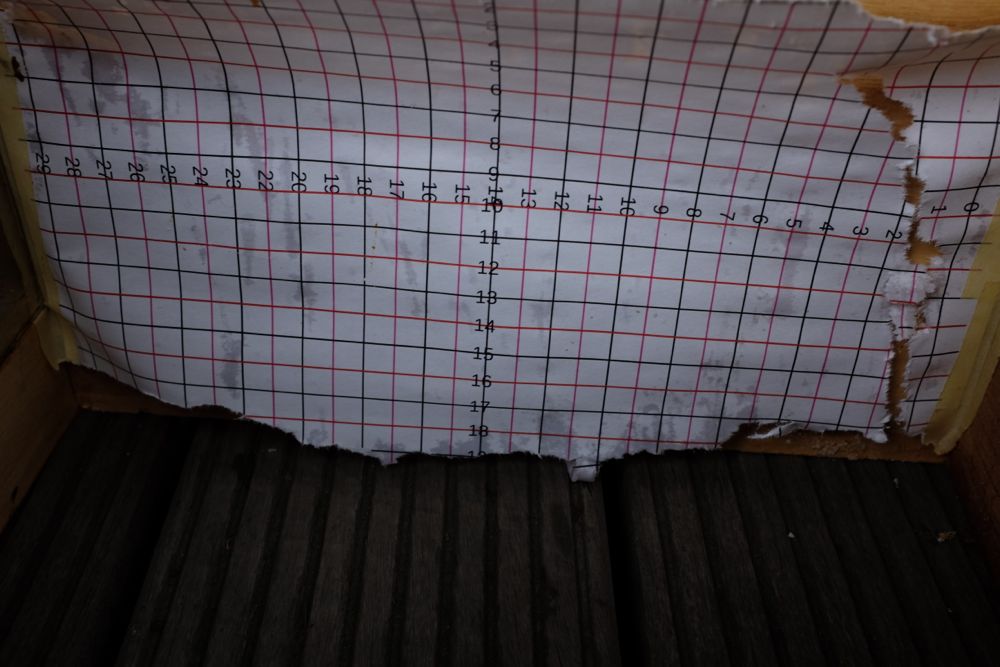
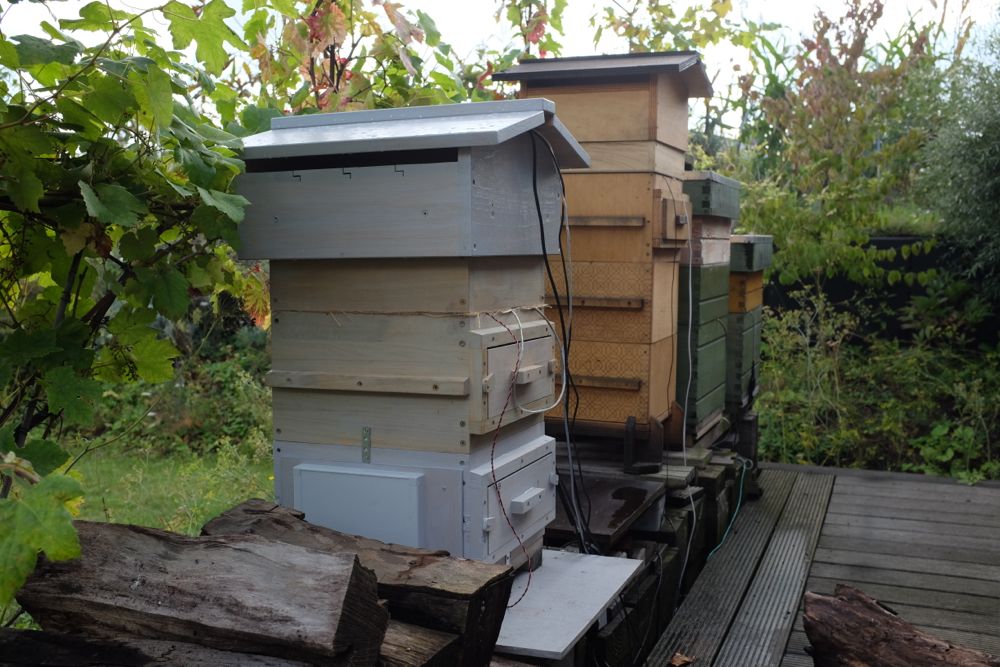
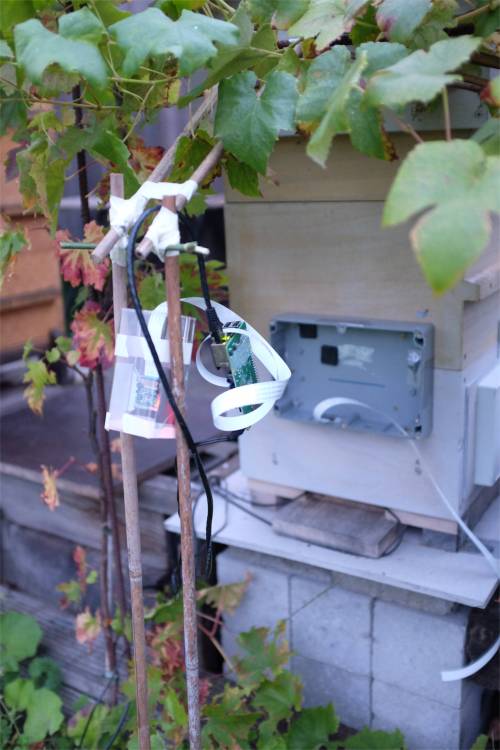
6/6/2014: Another Raspberry day. Today, Balt and me try to make the 2 Raspberries run regularly. We also make a new setup, so that the side of the hive (where all technology is located) is more easy accessible. We put the hive apart from the other beehives, with a 1 meter gap in between. We try out different framing for the PiNoir, with the help of a printed grid. We position the PiCam on the front a bit lower - now the image is perfectly sharp! Balt makes the NAS accessible from outside the local network, in order to check from a distance if the recordings are still going on. We also install a back up system with a dockstation and backup HD's.
I do some additional shopping at the Brico to fix cables and wires together, make some custommade powercables and I solidify the lower boxes of the beehive with metal pins. Now only the upper box -the one with the 8 microphones and the sensors- is freely movable. The other 2 boxes are fixed upon the hives' floor, as the 2 camera's can't be moved.
08/06/2014: to Balt
Finalement les abeilles vont arriver ce mardi 10 juin. Tout doit être accéléré.
J'ai monitoré de tout près les 2 camera's pendent les 2 derniers jours,
et par jour les camera arrêtent de fonctionner, chacuns ± 4 fois par jour.
Souvent le problème se situe quand il y a aussi un mauvais affichage de l'icone mp4. (et VLC est encore affiché)
Je pense donc que ça a avoir avec la conversion.
Ce qui n'est pas du tout clair pour moi, c'est à quelle heure ton programma du soleil (lever/coucher) fonctionne.
Je ne vois pas de régularité dans les timings.
Aussi je pense que tu peut supprimer le décodage automatique la nuit des veiux files.
Je vais les jeter d'office, je veux nettoyer le NAS tant que on a la place pour les bonnes vidéos.
Ce qui est bizar, c'est que le défect est toujours alterné:
une fois la PiCam, une fois la PiNoir, et ceci de suite.
Selon moi l'interruption se trouve dans le code, et certainement pas dans le hardware.
Est-ce que tu reçois des messages d'erreur????
Est-ce possible d'intégrer dans le code un restart automatique, quand le système détecte qu'il n'y a plus d'enrégistrements?
Automatic Schedule SunDawn/SunSet
Both PiCam and PiNoir start at 3:00 UCT and stop (on 9/10/2014) at 20:15 UCT.

15/6/2014: aan Bob
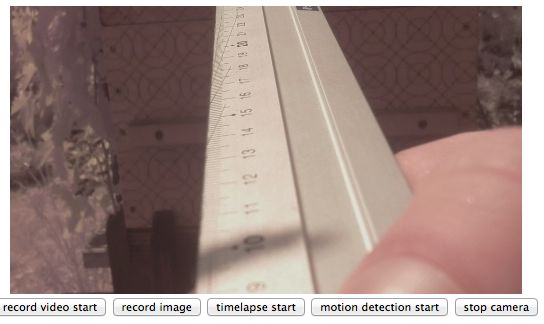
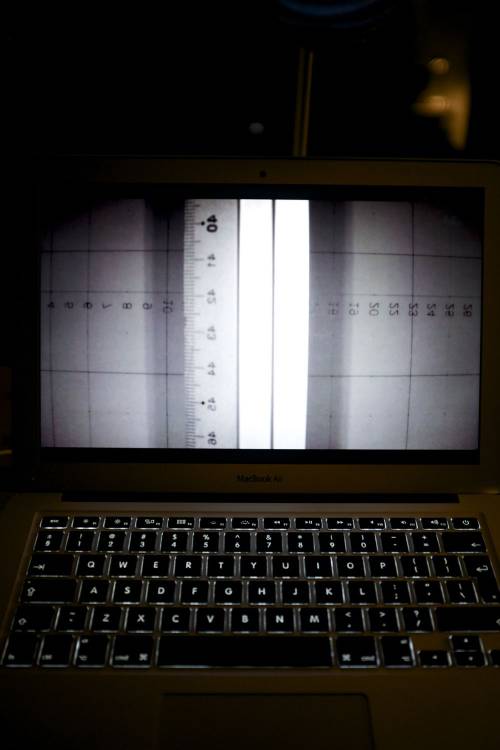
Ik vraag me nog steeds af hoe het komt dat het beeld van de PiNoir zo donker en flou is,
en waarom we het niet beter krijgen. De PiNoir is nochtns eens goede camera.
3 jaar geleden deed ik de observaties met een Logitech 9000 webcam,
die was van veel lagere resolutie en toch was het beeld veel scherper.
De leds gaven daar wel een rode schijn.
Nu vroeg ik me af of de scherpte van het beeld misschien afhangt van de sterkte van de LEDS?
De beelden uit de 2 beehives zijn van beeldkleur zeer verschillend:

17/6/2014: Bob
Dat de beeldkleur verschillend is, is volgens mij normaal: vermits de infrarood leds enkel infrarood licht uitstralen en we in een donkere bijenkast filmen is er geen andere lichtkleur die door de camera gedetecteerd kan worden.
Het is wel jammer dat de beelden zo onscherp zijn ja. Wat me opvalt is dat de scherpte afneemt van rechts naar links (de '0' is relatief scherp ivg met de '24' aan de andere kant), dus als ik het goed zie zit de camera een beetje schuin in de behuizing én moet de focus korter afgesteld worden. Zoals we verleden keer hebben gezien is dit echter niet makkelijk en we zouden een manier moeten vinden om 1. de camera beter te bevestigen en 2. subtielere aanpassingen van de positie en focus te kunnen maken. Dus daar zal ik eens over nadenken.
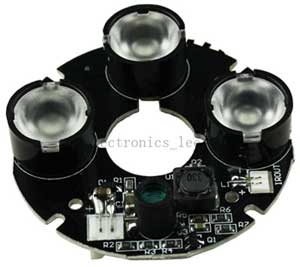
Night vision infrared IR LED Board for NoIR rapsberry pi camera module.
Can this be the solution to our PiNoir blurred-image problems? Found on e-bay thanks to Jeff.
http://www.ebay.fr/itm/Night-vision-infrared-IR-LED-Board-for-NoIR-rapsberry-pi-camera-module-/281383767177?hash=item4183c78c89&pt=LH_DefaultDomain_0
Sample Photos for Different Lens option on Raspberry Pi Camera:
http://www.arducam.com/

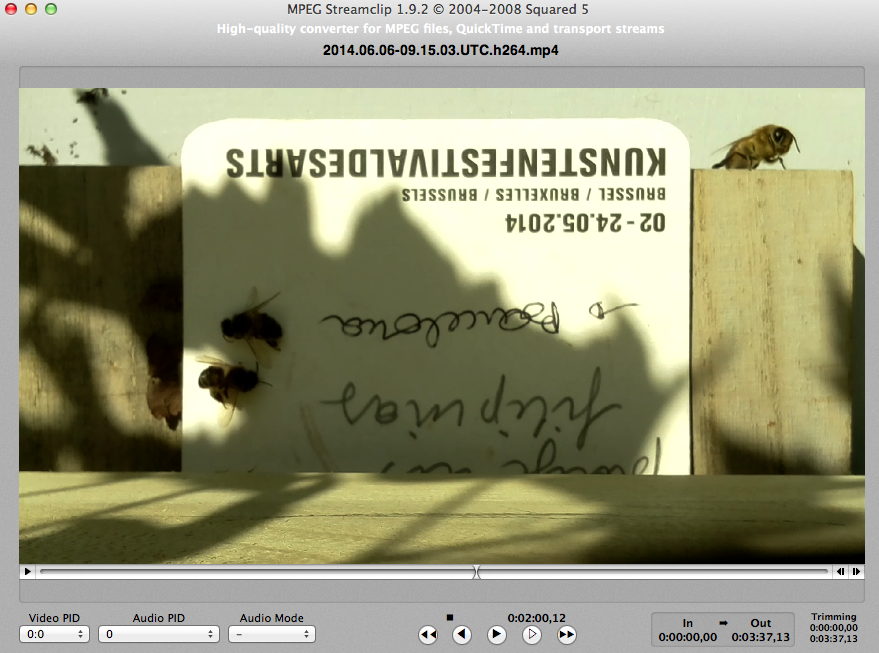
Check it out in Pandora: bee activity, 21 june 2014 at 08:15
Day of june 21 (the longest day, midsummernight). Activity after 10 days of colony populating the beehive.
I took all 3 minute clips (4 x an hour) and edited them in 1 long clip. Adjust contrast if necessary, cut overexposed frames at the beginning of each clip (option). Invert and adjust contrast if necessary.
29/6/2014:
De 2 Raspberry camera's blijven regelmatig uitvallen, onvoorspelbaar wanneer. Balt heeft al Watch Dogs geïnstalleerd, en probeert de ene Raspberry via de andere te controleren om na te gaan of hij nog draait, en zoniet hem heropstart. Ook dat is niet voldoende.
Dan installeren we een timer waar de 2 Raspberries opzitten. De timer herstart elke nacht om 01:00am de 2 Raspberries. Zodanig verliezen we maximum het video materiaal van 1 dag. De timer-methode werkt naar behoren, maar de Raspberries blijven toch regelmatig uitvallen, al is het dus nooit langer dan 1 dag. Na observatie denk ik toch dat de vochtigheid daar iets mee te maken heeft. Als de luchtvochtigheid groot is, of als het veel regent, is de kans groter dat de Raspberry het laat afweten.
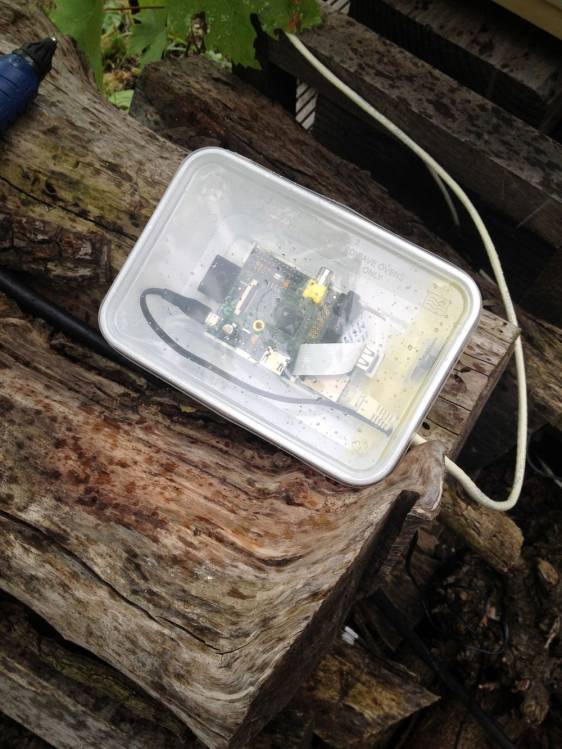
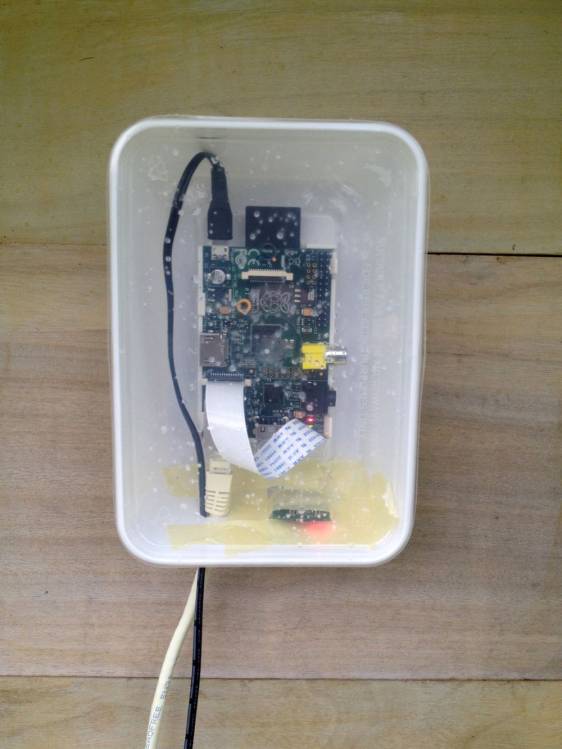
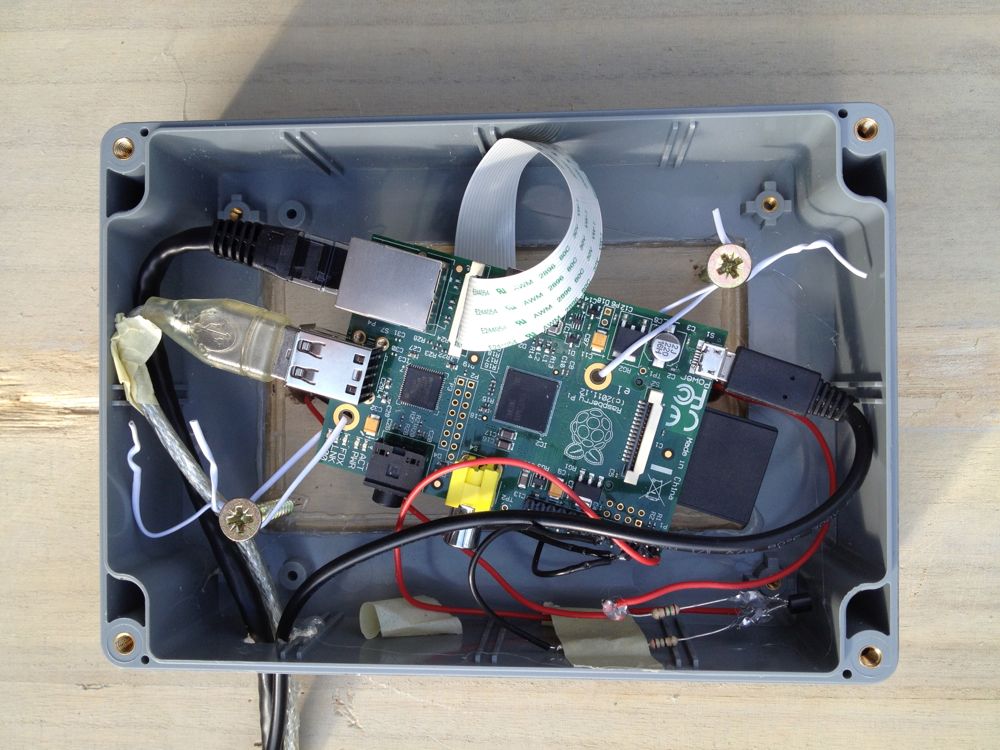
We hebben nu radiatoren besteld voor de Raspberries, maar eigenlijk zouden we hen moeten in een waterdichte doos steken. Nu is er in de doos nog steeds een gaatje voor de camera, al is dat heel minuscuul.
29/7/2014:
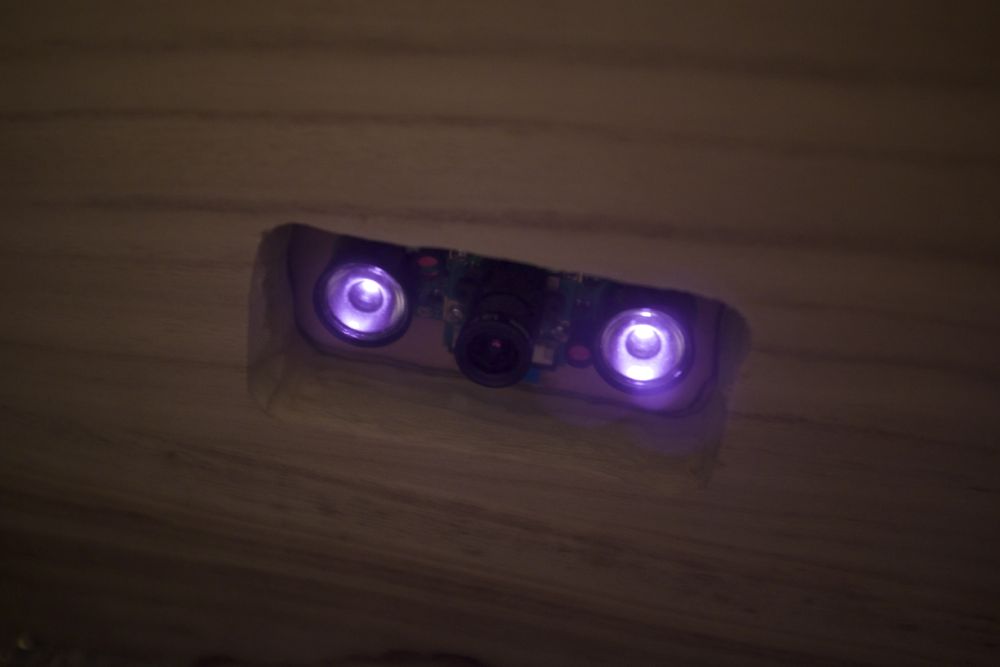
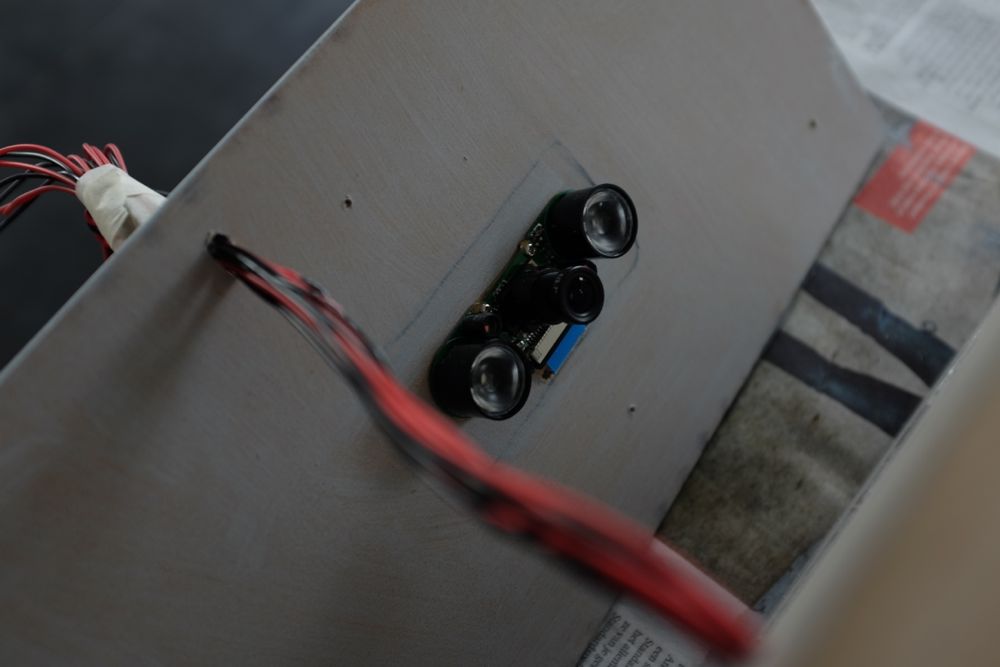
Het materiaal dat we bestelden in China is toegekomen: 1 infrared camera met een bredere hoek, en 2 speciale LED lights voor infrared. Ook de nieuwe Raspberry Pi B+ boards die we bestelden bij ModMyPi zijn toegekomen, samen met radiators om op de processors te zetten. Ik hoop dat we alles zo snel mogelijk kunnen installeren.
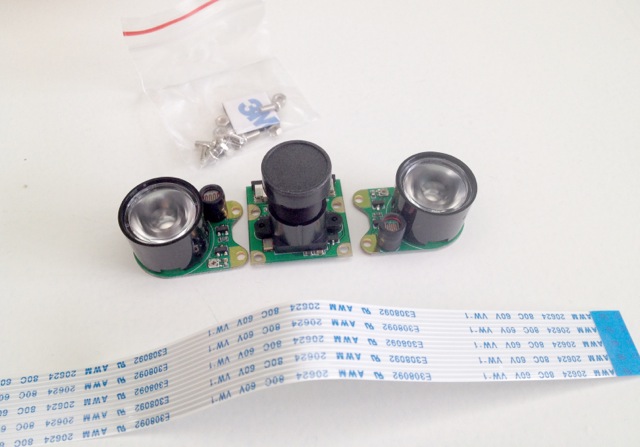
Raspberry Pi Infrared, 6mm lens en 2 infrared led lights
25/08/2014: Balt, Bob, Annemie
We update the broodbox for the soundbeehive. Balt installs the Raspberry B+ (more USB connections) and we also change the infrared PiNoir for a newer model (made in China) with a different lens and customized integrated led lights.
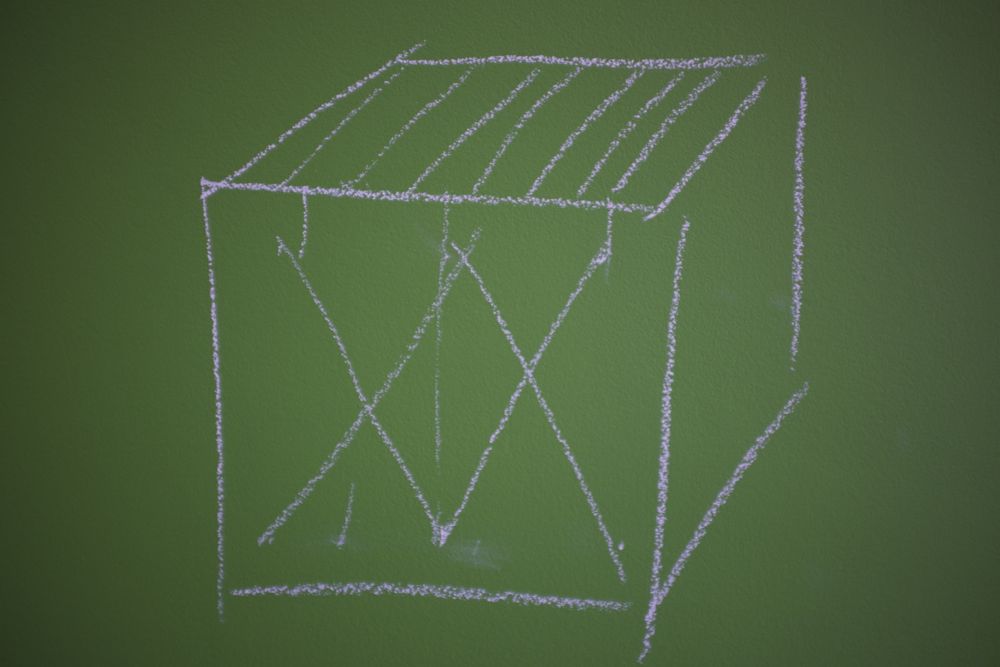
Bob prepared a series of 6 thermistors, which we add to both inner sides of the box, installed in V-format.
The tests with the new infrared camera are promising. As soon as it stops raining and temperature rises again (so we can open the hive), we will install the new box.
Together with the change of broodbox, we also will add an extra camera and soundcard for video and audio streaming.

Streaming URL (network)
video http://opengreens.mooo.com:8160
audio http://opengreens.mooo.com:8161
streaming URL (local)
http://192.168.1.101:8160
http://192.168.1.101:8161
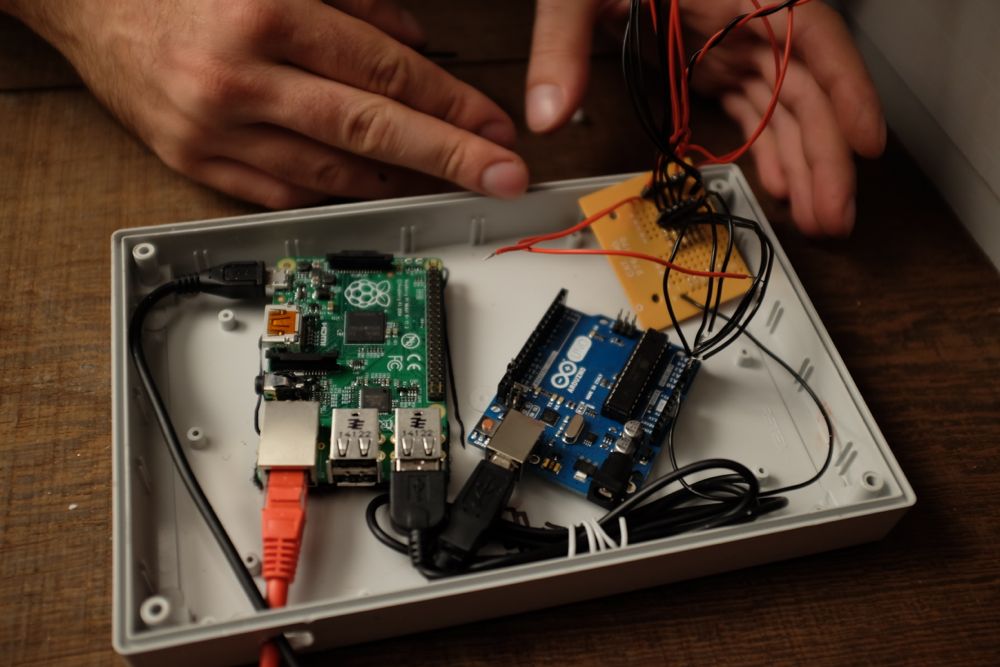
29/08/2014: Bob, Annemie
From 6:30pm we worked on connecting the thermistors to the arduino, and finalising the 2 boxes with cables etc. to make them ready to put into the beehive. We have 1 box for the front of the hive, in which we have 2 raspberry's. One for the video/audio streaming, and 1 for the 4x/hour recordings. As we've put 2 camera's in 1 box, the frame is not in the middle of the landingplatform anymore. I have to correct this. Also, we've put the lens-adjustor (that was 3D-printed by Nico in Sony Paris) on the lens of the streaming camera for easy adjusting the focus. Doing this, Bob has put a lot of glue onthe lens of the camera, which makes that we have to install a new camera :(
30/08/2014: Annemie, Luc
Luc helps me to put the 2 new boxes in place. I take the lower box away and leave the hive on 2 boxes, this is better for temperature household for winter. Later, I make all connections for the 3 Raspberry's, the camera's and the sound. The sound from the small USB card is very bad. The image focus of the streaming camera is spoiled due to the glue, we have to buy a new camera. The image of the PiCam which is recording 4x an hour, is still OK, but I need to adjust the framing, we see only half of the platform anymore.
OK, framing adjusted, but lens is not yet in focus. Image is also still reversed.
For the audiostreaming, we have to solve the problem of the Focusrite/Scarlett soundcard: this one does not work with linux! The quick solution with a low budget soundcard is not good at all for sound quality.
First OK images in the new setup, for the PiNoir starting on august 31st at 14:45 UTC, and for the PiCam (landing platform) on august 31st at 18:00 UTC.


06+07/09/2014: Annemie, Balt and Annemie (alone)
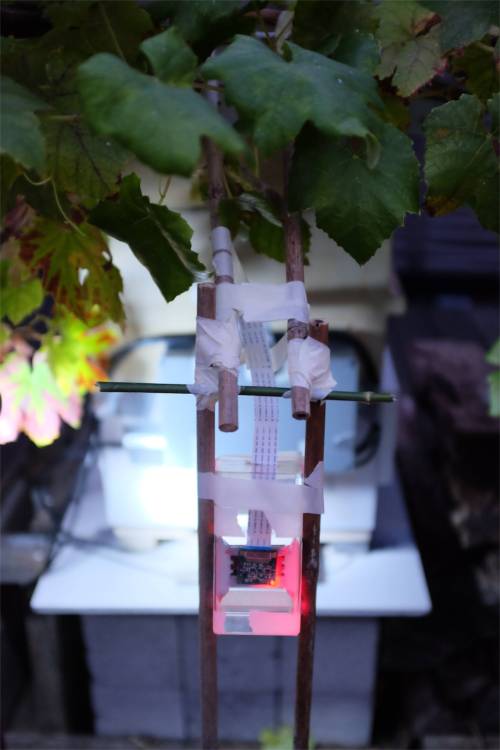
Immediately after landing from Riga, I continue with Balt on the image streaming and reframing of the Sound Beehive. We start at 4pm and continue till 9pm. By than, we tested out the several Raspberries and thought on solutions for placing as well the recording camera as the streaming camera on a good spot to cover the landing platform surface. As the platform is so small, it is difficult to have both the camera's next to each other in 1 box. Therefore we decide to put the streaming camera facing the hive from the front.
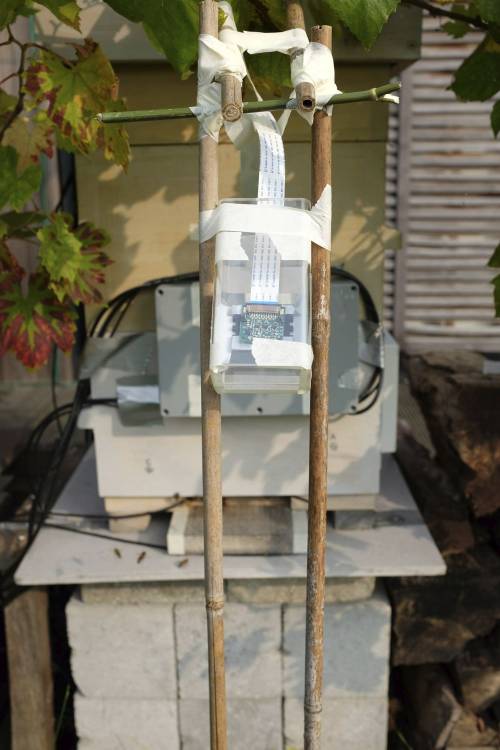
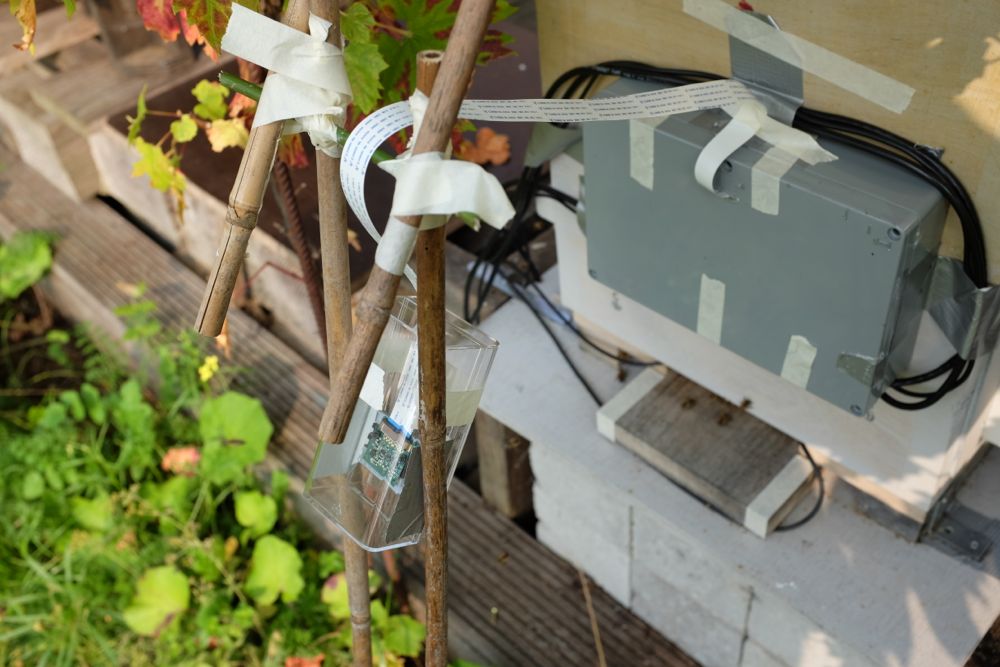
I am disappointed by the quality of the Raspberry equipment. We had already before some non-working boards, and now again, the code on the camera board is not responding. Also, the fixed lens is always a problem and a true limitation to work with. Hacking the depth of field is dangerous for scratching the lens. The second day (sunday) I work the whole day for making a good framing and clear focus point for the PiCam. I also set up a construction for the streaming camera (in between 2 sticks) and after a few hours I can finally tape everything well together in a pack … I hope the set up will last a while …
Things still to do: connect the thermistors, arrange the sound streaming (together with the image).


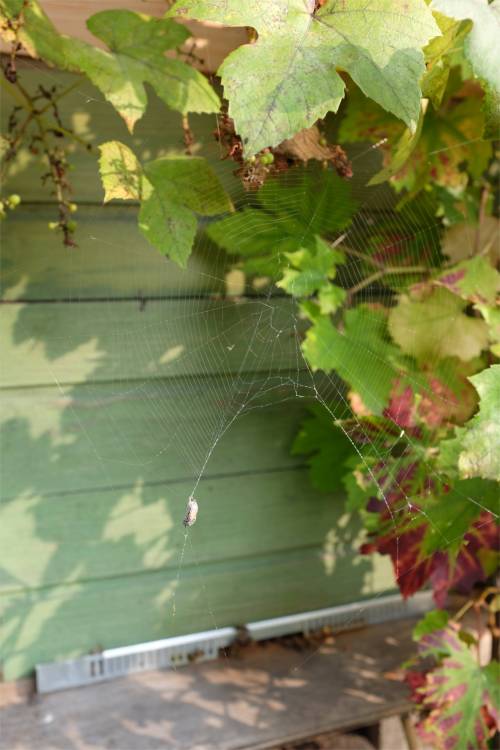
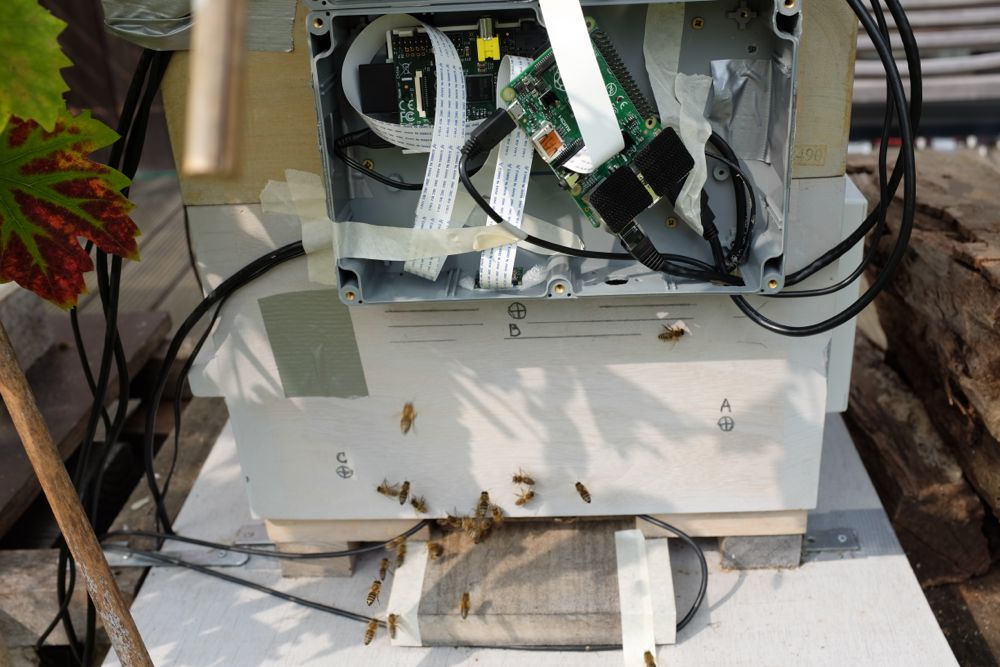
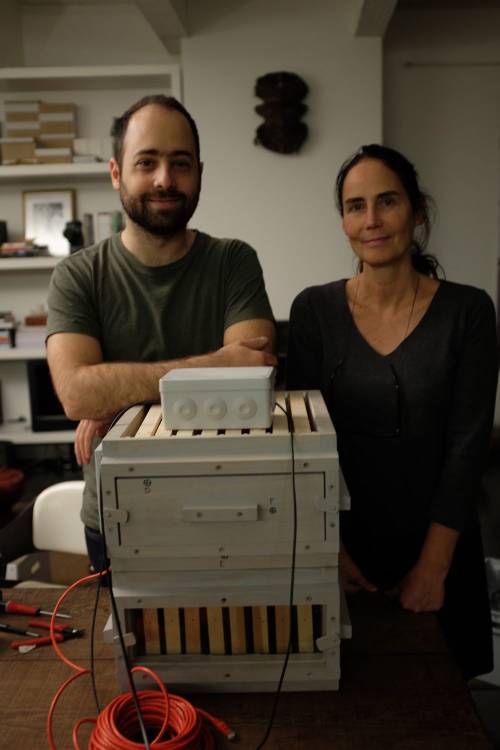
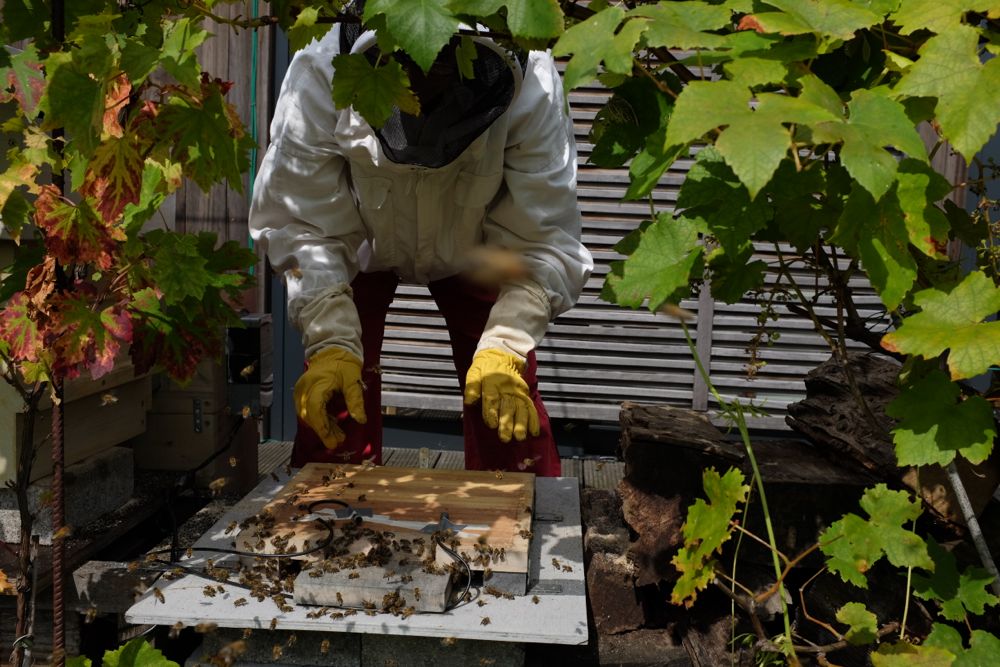
bees and cables (they don't mind) (the soundbeehive colony is a sweetie)
new noir (from china)
the bees and me, working together
the bees and me, working together 2
more info in InfraRed lenses:

bee flightroutes tracking
Examples by hivetool.org
http://sonic.net/~goddard/home/bees/bees.html

http://hivetool.org - bee flightroutes tracking
Video Monitoring of Honey Bee Colonies at the Hive Entrance